运行
pnpm i
pnpm dev
从零开始构建
TIP
这是我完成 Keyless 实践(next-keyless-example)后第二次实现的(aa-top-keyless-example-next)
# 支持无密钥功能的实验性 SDK 版本
pnpm install @aptos-labs/ts-sdk@zeta
# jwt 解码
pnpm i jwt-decode
目的
需要做什么?
标记的位置不是按钮,所以需要新增一个按钮,
配置 Google 凭据(Credentials)
安装 SDK 和工具配置
一、准备环境
包括 Google 的配置和前端框架 配置
1. 配置 OpenID 集成
目前只支持 Google。Aptos 将在以后支持其他的 OIDC 提供商(例如苹果、Kakaotalk、微软等)。
| 身份提供者 | 认证 URL |
|---|---|
https://accounts.google.com/o/oauth2/v2/auth/oauthchooseaccount?client_id=$%7BCLIENT_ID%7D&redirect_uri=$%7BREDIRECT_URI%7D&response_type=id_token&scope=openid%20email&nonce=$%7BNONCE%7D |
隐式流程(无授权码交换)是首选的身份验证方法。下面的集成步骤假定使用隐式流程。
为了支持 OpenID 身份验证,您需要从 Google 获取 client_id,并设置授权来源和重定向 URI。
在 Google API 控制台 中设置您的项目。
注册 Google 云账户(如果您还没有)
- 创建一个新项目或选择现有项目
- 上方的
下拉选择器中创建项目→ 在左侧菜单中选择API 和服务→凭据→ 上方创建凭据→OAuth 客户端 ID→配置同意屏幕→外部→创建→发布应用→提交验证
- 上方的
-
转到凭据页面。
创建凭据→创建 OAuth 客户端 ID
-
如果之前没有设置过 OAuth 同意屏幕,您可能需要进行设置。
- 这是您将为应用程序配置一些应用信息以及应用程序的作用域和权限的地方。
-
选择或创建一个新的“OAuth 2.0 Client ID”。
-
配置授权来源(您的 dApp 来源)。
- 这可能是
http://localhost:3000用于本地开发。 - 确保在部署应用程序后更新这些来源。
- 这可能是
-
配置重定向 URI(在身份验证后接收授权码和/或
id_token的回调处理程序)。- 例如:
http://localhost:3000/callback用于本地开发。
- 例如:
-
获取您的应用程序的
client_id。- 将其保存在您的
.env变量或常量文件中。
- 将其保存在您的
TIP
至此,我默认你已经准备好了
客户端 ID,它看起来像这样40604332144-aaa7a6a5a7a78s7sa8a8ag77aa6a6a.apps.googleusercontent.com
2. 安装 Next.js 框架
npx create-next-app@latest
##############################################################################
> 你的项目名是什么?# 它会创建一个该名称的文件夹(项目),然后使用之后的选项来初始化这个文件夹(项目)
> 你希望使用 TypeScript 吗? # TypeScript 扩展了 JavaScript 的语法,添加了一些新特性,例如接口、枚举、泛型等,前者是后者的超级
> 你希望使用 ELSint 吗? # ELSint 是用于 JavaScript 和 TypeScript 代码静态分析的工具
> 你希望使用 Tailwind CSS 吗? # Tailwind CSS 是一个基于原子类的 CSS 框架,它提供了一组预定义的 CSS 类,用于快速构建现代 Web 界面
> 是否要在项目中使用 `src/` 目录? # 通常,src/ 目录是用来存放源代码(source code)的目录,开发者
> 是否想要使用应用程序路由器(App Router)?推荐使用 # 应用程序路由器是一种工具或库,用于管理应用程序中不同页面之间的导航和路由。
> 是否希望自定义默认的导入别名(@/*)?  # 默认的 NO 选项表示:`import React from 'react'` 这样的语句可以被简化为 `import React from '@/react'`,其中 `@` 是一个别名,代表了项目的根目录。类似地,`@/components/Header` 可以代表项目根目录下的 `components/Header` 路径。
进入项目根目录
cd <你的项目名>现在你可以测试启动,检查是否成功安装
npm run dev
# or
yarn dev
# or
pnpm dev
# or
bun dev
输出
pnpm dev

> test-keyless-example-next@0.1.0 dev /Users/caoyang/Desktop/GitHub/aptos_mvoe-learning/Dapp/test/test-keyless-example-next
> next dev

 ⚠ Port 3000 is in use, trying 3001 instead. # 我的 3000 端口已经被使用了,所以使用的是 3001 端口
  ▲ Next.js 14.2.3
  - Local:        http://localhost:3001 # 访问这儿显示的端口
你应该可以看到 NEXT.js 的主页
关于src/app 中每个文件的作用可以在附录中查看
3. 安装 Aptos SDK(Keyless 版本)
pnpm install @aptos-labs/ts-sdk@zetaNOTE
注意:一定是
@zeta,因为目前只有这个 Tag 下的包可以使用keyless
4. 修改 page.tsx 页面
4.1 添加 Keyless “按钮”
没有使用
<button>是因为我们要实现页面跳转的功能,使用<a>更为直观
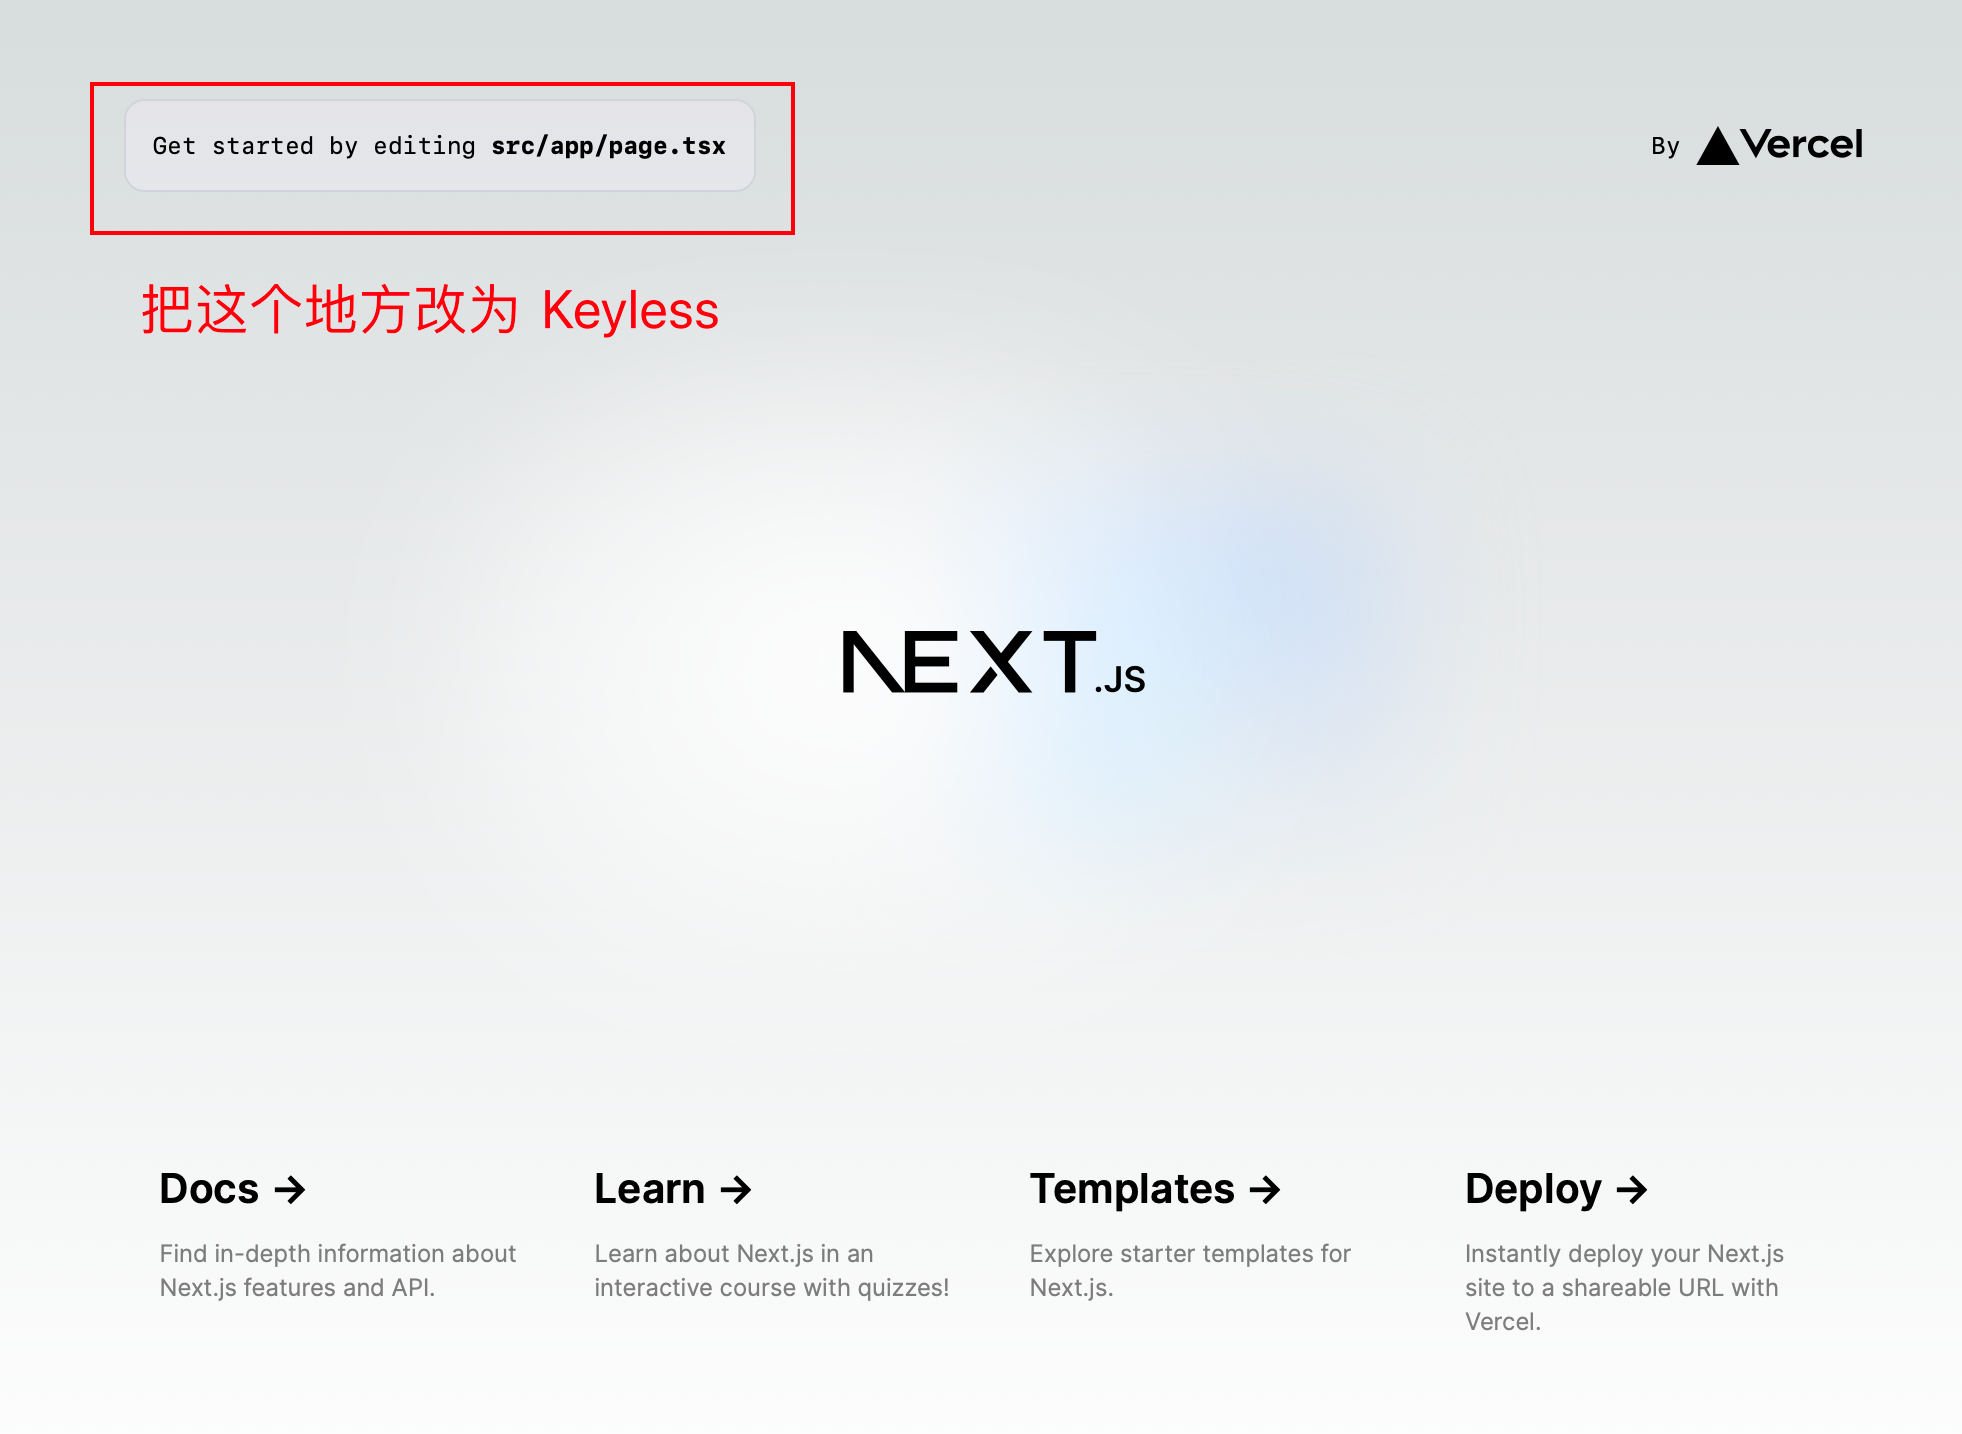
- 找到
Get started by editin
# 注释原来的内容
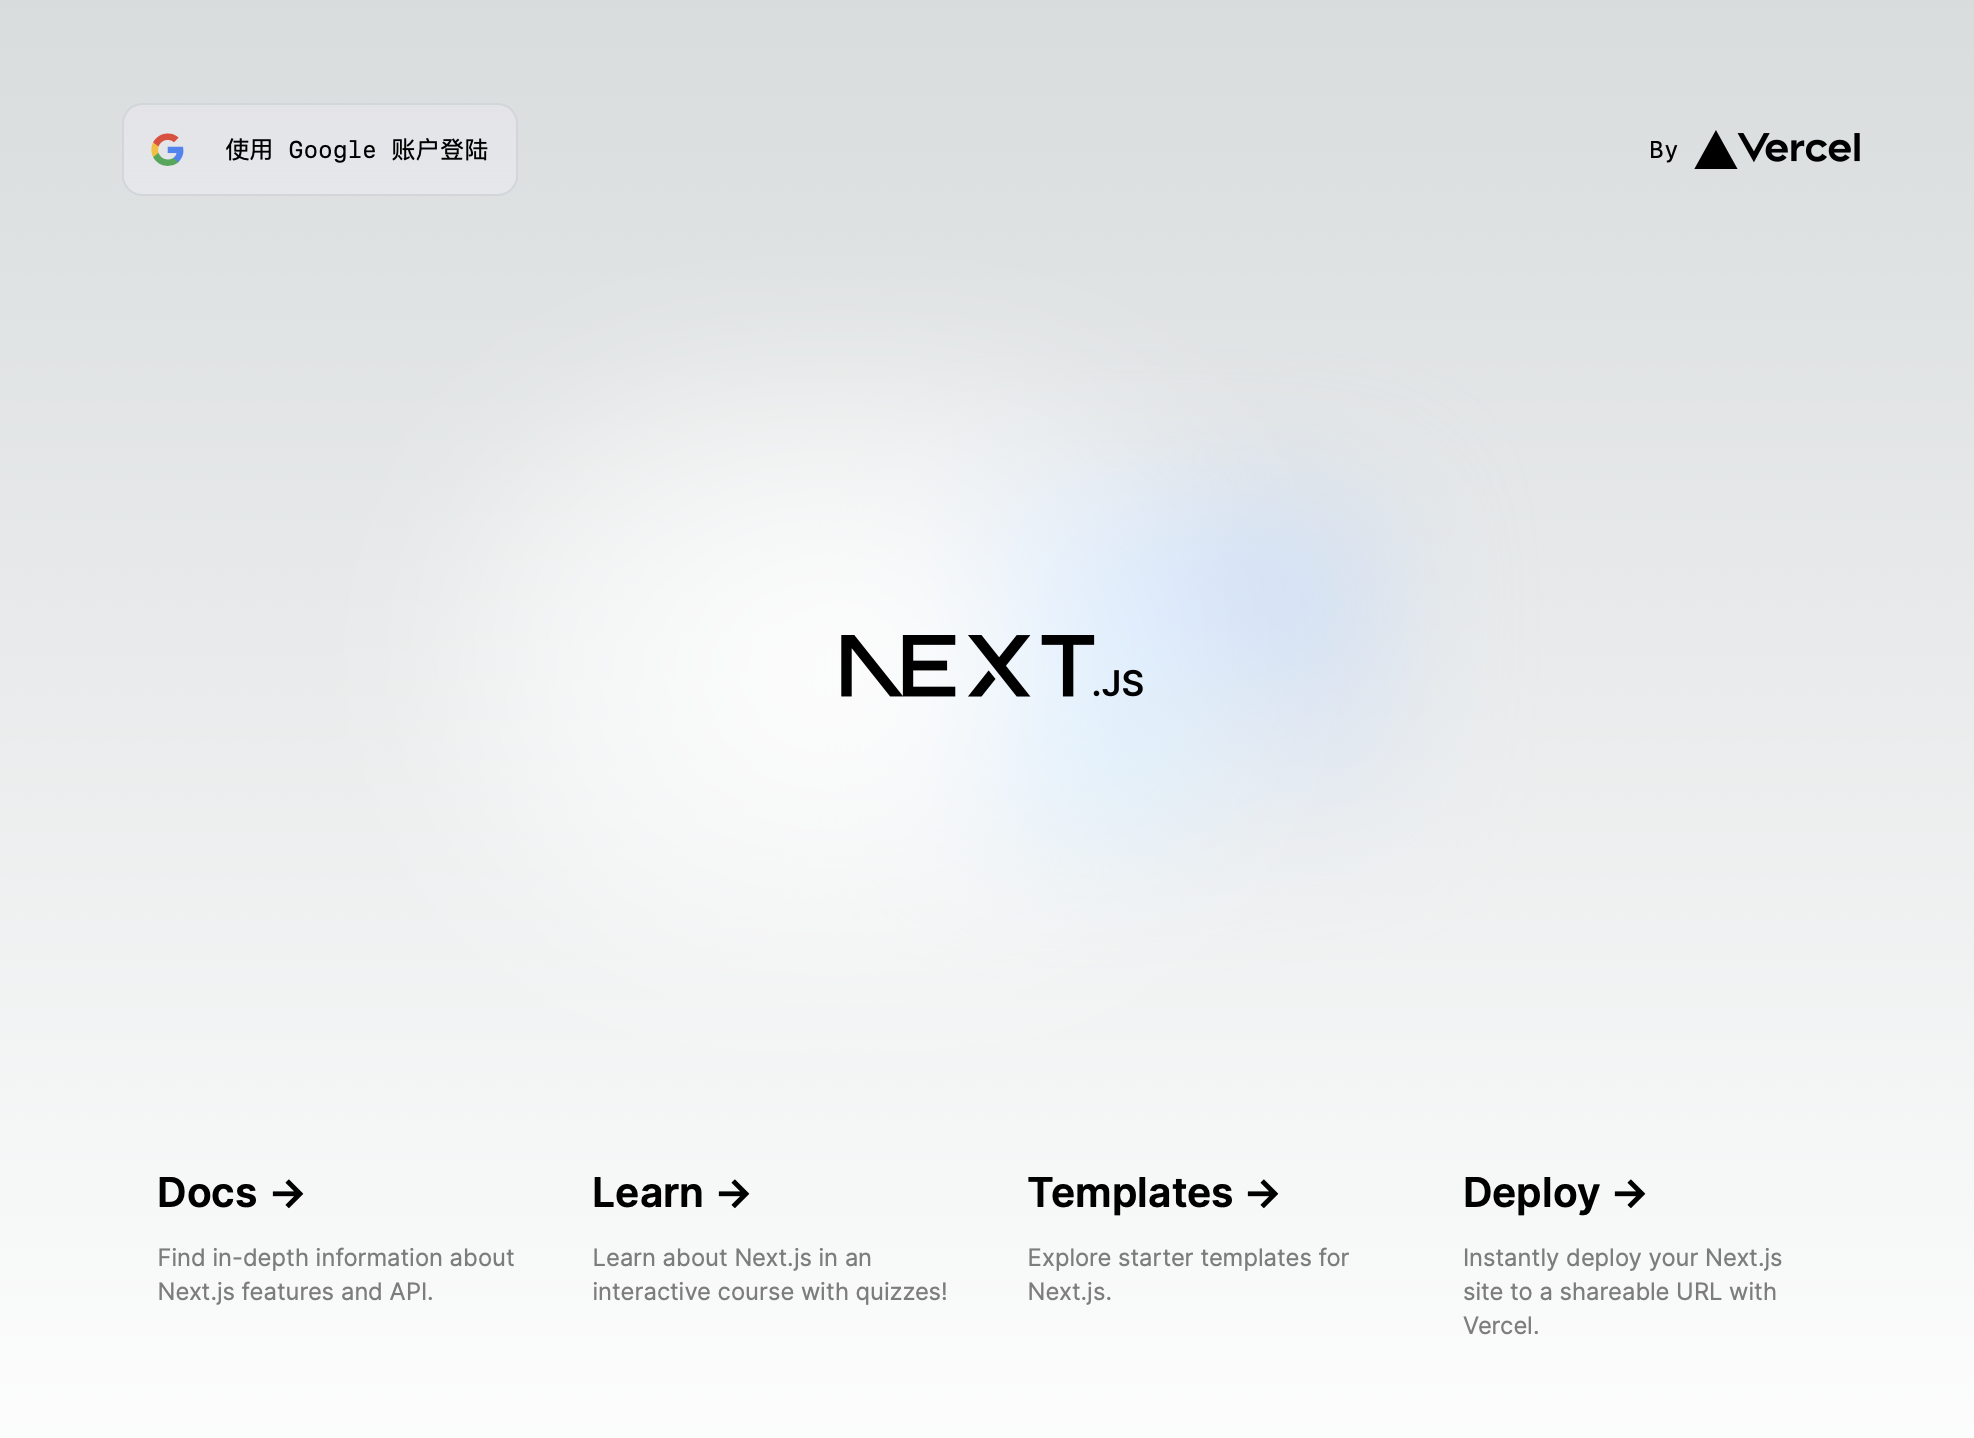
{/* <p className="fixed left-0 top-0 flex w-full justify-center border-b border-gray-300 bg-gradient-to-b from-zinc-200 pb-6 pt-8 backdrop-blur-2xl dark:border-neutral-800 dark:bg-zinc-800/30 dark:from-inherit lg:static lg:w-auto lg:rounded-xl lg:border lg:bg-gray-200 lg:p-4 lg:dark:bg-zinc-800/30">Get started by editing <code className="font-mono font-bold">src/app/page.tsx</code></p> */}- 改为(链接可以不写,这只是一个样例)
<a href="https://www.chyraw.com">使用 Google 账户登陆</a>- 也可以添加一点样式(从原来的
<p>里面复制)
<a
  href="https://www.chyraw.com"
  className="border-b border-gray-300 bg-gradient-to-b from-zinc-200 pb-6 pt-8 backdrop-blur-2xl dark:border-neutral-800 dark:bg-zinc-800/30 dark:from-inherit lg:static lg:w-auto  lg:rounded-xl lg:border lg:bg-gray-200 lg:p-4 lg:dark:bg-zinc-800/30"
>
  使用 Google 账户登陆
</a>
这段配置用于定义一个组件的样式,使用的是 Tailwind CSS,它包括边框、背景、内边距、圆角和暗黑模式下的样式。这些样式可以应用于 Next.js 中的任何组件,以实现特定的视觉效果
当前效果
4.2 组件化
考虑到登陆按钮是一个特定的功能,所以从页面里面拆分出去,作为一个独立的组件
4.2.1 创建 src/components/WalletButtons/index.tsx 文件
'use client'

export default function WalletButtons() {
  return (
    <>
      <a
        href="https://www.chyraw.com"
        className="border-b border-gray-300 bg-gradient-to-b from-zinc-200 pb-6 pt-8 backdrop-blur-2xl dark:border-neutral-800 dark:bg-zinc-800/30 dark:from-inherit lg:static lg:w-auto  lg:rounded-xl lg:border lg:bg-gray-200 lg:p-4 lg:dark:bg-zinc-800/30"
      >
        使用 Google 账户登陆
      </a>
    </>
  )
}
4.2.2 在 src/app/page.tsx 中导入 WalletButtons 组件
import Image from 'next/image'
// 增加导入组件, @ 表示根路径 src
import WalletButtons from '@/components/WalletButtons'

export default function Home() {
  return (
    <main className="flex min-h-screen flex-col items-center justify-between p-24">
      <div className="z-10 w-full max-w-5xl items-center justify-between font-mono text-sm lg:flex">
        // 之前的所有更改都变更为这一句
        <WalletButtons />
        ...
5. 创建 src/hooks 文件夹
5.1 创建 src/hooks/useEphemeralKeyPair.tsx
创建一个新的 useEphemeralKeyPair() 钩子,将临时密钥对保存在本地存储中,以它的 nonce 作为键
import { EphemeralKeyPair } from '@aptos-labs/ts-sdk'

export default function useEphemeralKeyPair() {
  const ephemeralKeyPair = EphemeralKeyPair.generate()
  storeEphemeralKeyPair(ephemeralKeyPair)

  return ephemeralKeyPair
}code:useEphemeralKeyPair 完整代码
import { EphemeralKeyPair } from '@aptos-labs/ts-sdk'

// 从 localStorage 中存储临时密钥对(nonce -> ephemeralKeyPair)
export type StoredEphemeralKeyPairs = { [nonce: string]: EphemeralKeyPair }

// 从 localStorage 中检索具有给定 nonce 的临时密钥对。
export const getLocalEphemeralKeyPair = (
  nonce: string
): EphemeralKeyPair | null => {
  const keyPairs = getLocalEphemeralKeyPairs()

  // 获取具有给定 nonce 的账户(生成的临时密钥对的 nonce 可能与 localStorage 中的不匹配),因此我们需要在返回之前验证它(具体实现)。
  const ephemeralKeyPair = keyPairs[nonce]
  if (!ephemeralKeyPair) return null

  // 如果账户有效,则返回它,否则从设备中移除并返回null
  return validateEphemeralKeyPair(nonce, ephemeralKeyPair)
}

// 验证具有给定nonce和过期时间戳的临时密钥对。
// 如果nonce与临时密钥对生成的nonce不匹配,
// 则从localStorage中移除临时密钥对。
// 这是为了验证nonce算法是否相同(例如,如果nonce算法发生变化)
export const validateEphemeralKeyPair = (
  nonce: string,
  ephemeralKeyPair: EphemeralKeyPair
): EphemeralKeyPair | null => {
  // 检查账户的 nonce 和过期时间戳,看它是否有效
  if (
    nonce === ephemeralKeyPair.nonce &&
    ephemeralKeyPair.expiryDateSecs > BigInt(Math.floor(Date.now() / 1000))
  ) {
    return ephemeralKeyPair
  }
  removeEphemeralKeyPair(nonce)
  return null
}

/**
 * 从 localStorage 中移除具有给定 nonce 的临时密钥对。
 */
export const removeEphemeralKeyPair = (nonce: string): void => {
  const keyPairs = getLocalEphemeralKeyPairs()
  delete keyPairs[nonce]
  localStorage.setItem('ephemeral-key-pairs', encodeEphemeralKeyPairs(keyPairs))
}

// 从 localStorage 中检索所有临时密钥对并解码它们。
// 然后将新的临时密钥对存储在localStorage中,以nonce作为键。
export const storeEphemeralKeyPair = (
  ephemeralKeyPair: EphemeralKeyPair
): void => {
  // 从 localStorage 中检索当前的临时密钥对
  const accounts = getLocalEphemeralKeyPairs()

  // 将新的临时密钥对存储在 localStorage 中
  accounts[ephemeralKeyPair.nonce] = ephemeralKeyPair

  if (typeof localStorage === 'undefined') return
  localStorage.setItem('ephemeral-key-pairs', encodeEphemeralKeyPairs(accounts))
}

/**
 * 从 localStorage 中检索所有临时密钥对并解码它们。
 */
export const getLocalEphemeralKeyPairs = (): StoredEphemeralKeyPairs => {
  const rawEphemeralKeyPairs =
    typeof localStorage !== 'undefined'
      ? localStorage.getItem('ephemeral-key-pairs')
      : null
  try {
    return rawEphemeralKeyPairs
      ? decodeEphemeralKeyPairs(rawEphemeralKeyPairs)
      : {}
  } catch (error) {
    // eslint-disable-next-line no-console
    console.warn(
      'Failed to decode ephemeral key pairs from localStorage',
      error
    )
    return {}
  }
}

// 用于在 localStorage 中存储 EphemeralKeyPair 类的编码
const EphemeralKeyPairEncoding = {
  decode: (e: any) => EphemeralKeyPair.fromBytes(e.data),
  encode: (e: EphemeralKeyPair) => ({
    __type: 'EphemeralKeyPair',
    data: e.bcsToBytes(),
  }),
}

// 将临时密钥对字符串化以存储在 localStorage 中
export const encodeEphemeralKeyPairs = (
  keyPairs: StoredEphemeralKeyPairs
): string =>
  JSON.stringify(keyPairs, (_, e) => {
    if (typeof e === 'bigint') return { __type: 'bigint', value: e.toString() }
    if (e instanceof Uint8Array)
      return { __type: 'Uint8Array', value: Array.from(e) }
    if (e instanceof EphemeralKeyPair) return EphemeralKeyPairEncoding.encode(e)
    return e
  })

// 从字符串中解析临时密钥对
export const decodeEphemeralKeyPairs = (
  encodedEphemeralKeyPairs: string
): StoredEphemeralKeyPairs =>
  JSON.parse(encodedEphemeralKeyPairs, (_, e) => {
    if (e && e.__type === 'bigint') return BigInt(e.value)
    if (e && e.__type === 'Uint8Array') return new Uint8Array(e.value)
    if (e && e.__type === 'EphemeralKeyPair')
      return EphemeralKeyPairEncoding.decode(e)
    return e
  })

export default function useEphemeralKeyPair() {
  const ephemeralKeyPair = EphemeralKeyPair.generate()
  storeEphemeralKeyPair(ephemeralKeyPair)

  return ephemeralKeyPair
}
5.2 在 WalletButtons组件中生成临时密钥对
src/components/WalletButtons/index.tsx
'use client'
// 新增的
import { useKeylessAccount } from '@/context/KeylessAccountContext'
// -----------------------
export default function WalletButtons() {
  // 新增的
  const ephemeralKeyPair = useEphemeralKeyPair()
  // -----------------------------------
  return (
    <>
      <a
        href="https://www.chyraw.com"
        className="border-b border-gray-300 bg-gradient-to-b from-zinc-200 pb-6 pt-8 backdrop-blur-2xl dark:border-neutral-800 dark:bg-zinc-800/30 dark:from-inherit lg:static lg:w-auto  lg:rounded-xl lg:border lg:bg-gray-200 lg:p-4 lg:dark:bg-zinc-800/30"
      >
        使用 Google 账户登陆
      </a>
    </>
  )
}
5.3 设置 OAuth 流程
WalletButtons/index.tsx
const redirectUrl = new URL('https://accounts.google.com/o/oauth2/v2/auth')
const searchParams = new URLSearchParams({
  // 用您自己的客户端 ID 替换
  client_id: process.env.NEXT_PUBLIC_GOOGLE_CLIENT_ID,
  // redirect_uri 必须在 Google Developer Console 中注册。这个回调页面
  // 从 URL 片段解析 id_token,并将其与临时密钥对结合
  // 以派生无钥匙账户。
  // window.location.origin == http://localhost:3000
  redirect_uri: `${window.location.origin}/callback`,

  //这使用 OpenID Connect 隐式流程返回 id_token。这被推荐用于 SPAs(单页应用程序),因为它不需要后端服务器。
  response_type: 'id_token',
  scope: 'openid email profile',
  nonce: ephemeralKeyPair.nonce,
})
redirectUrl.search = searchParams.toString()
当用户点击登录按钮时,将用户重定向到你刚刚创建的 redirectUrl。
WalletButtons/index.tsx
<a href={redirectUrl.toString()}>使用 Google 账户登陆</a>code:WalletButtons 完整代码
TIP
这里我已经把
<a>的样式提出来了
WalletButtons/index.tsx
'use client'

import useEphemeralKeyPair from '@/hooks/useEphemeralKeyPair'

const aStyles =
  'border-b border-gray-300 bg-gradient-to-b from-zinc-200 pb-6 pt-8 backdrop-blur-2xl dark:border-neutral-800 dark:bg-zinc-800/30 dark:from-inherit lg:static lg:w-auto  lg:rounded-xl lg:border lg:bg-gray-200 lg:p-4 lg:dark:bg-zinc-800/30'

export default function WalletButtons() {
  const ephemeralKeyPair = useEphemeralKeyPair()

  const redirectUrl = new URL('https://accounts.google.com/o/oauth2/v2/auth')

  const searchParams = new URLSearchParams({
    // 请替换为您的客户端ID
    client_id: process.env.NEXT_PUBLIC_GOOGLE_CLIENT_ID,
    // redirect_uri 必须在Google开发者控制台中注册。此回调页面解析URL片段中的id_token,并将其与临时密钥对结合以派生无密钥账户。
    redirect_uri:
      typeof window !== 'undefined'
        ? `${window.location.origin}/callback`
        : (process.env.NODE_ENV === 'development'
            ? 'http://localhost:3000'
            : process.env.NEXT_PUBLIC_VERCEL_URL) + '/callback',
    // 这使用了 OpenID Connect 隐式流返回 id_token。这对于单页应用(SPA)是推荐的,因为它不需要后端服务器。
    response_type: 'id_token',
    scope: 'openid email profile',
    nonce: ephemeralKeyPair.nonce,
  })

  redirectUrl.search = searchParams.toString()
  console.log('redirectUrl is : ', redirectUrl.search)

  return (
    <>
      <a href={redirectUrl.toString()} className={aStyles}>
        使用 Google 账户登陆
      </a>
    </>
  )
}
6. 创建回调页面 src/app/callback/page.tsx
这里需要解析
jwt,所以要安装jwt-decodepnpm i jwt-decode
-
用户完成登录流程后,将被重定向到前面设置的
redirect_uri-
JWT 将作为一个搜索参数在 URL 片段中设置,通过
id_token作为键,即最终效果为id_token=xxxxxxxxxx -
通过以下方式从窗口中提取 JWT:
callback/page.tsxconst parseJWTFromURL = (url: string): string | null => { const urlObject = new URL(url) const fragment = urlObject.hash.substring(1) const params = new URLSearchParams(fragment) return params.get('id_token') } // window.location.href = https://.../callback#id_token=... const jwt = parseJWTFromURL(window.location.href)
-
-
解码 JWT 并从负载中提取
nonce值callback/page.tsximport { jwtDecode } from 'jwt-decode' const payload = jwtDecode<{ nonce: string }>(jwt) const jwtNonce = payload.nonce -
使用解码后的 nonce 获取
EphemeralKeyPair(在登录流程前存储)callback/page.tsxconst ephemeralKeyPair = getLocalEphemeralKeyPair(jwtNonce) -
获取本地临时密钥对的示例实现:
- 这包括临时密钥对的验证和移除
/**
 * 从localStorage中检索给定 nonce 的临时密钥对。
 */
export const getLocalEphemeralKeyPair = (
  nonce: string
): EphemeralKeyPair | null => {
  const keyPairs = getLocalEphemeralKeyPairs()

  // 使用给定 nonce 获取账户(生成的 nonce 可能与 localStorage 中的 nonce 不匹配)
  // 因此,我们需要在返回之前验证它(特定于实现)。
  const ephemeralKeyPair = keyPairs[nonce]
  if (!ephemeralKeyPair) return null

  // 如果账户有效,则返回它,否则从设备中移除并返回 null
  return validateEphemeralKeyPair(nonce, ephemeralKeyPair)
}

/**
 * 使用给定的 nonce 和过期时间戳验证临时密钥对。如果 nonce 与临时密钥对生成的 nonce 不匹配,
 * 则从 localStorage 中移除临时密钥对。这是为了验证 nonce 算法是否相同(例如,如果 nonce 算法发生了变化)。
 */
export const validateEphemeralKeyPair = (
  nonce: string,
  ephemeralKeyPair: EphemeralKeyPair
): EphemeralKeyPair | null => {
  // 检查账户的 nonce 和过期时间戳,看它是否有效
  if (
    nonce === ephemeralKeyPair.nonce &&
    ephemeralKeyPair.expiryDateSecs > BigInt(Math.floor(Date.now() / 1000))
  ) {
    return ephemeralKeyPair
  }
  removeEphemeralKeyPair(nonce)
  return null
}

/**
 * 从localStorage中移除给定 nonce 的临时密钥对。
 */
export const removeEphemeralKeyPair = (nonce: string): void => {
  const keyPairs = getLocalEphemeralKeyPairs()
  delete keyPairs[nonce]
  localStorage.setItem(
    'ephemeral-key-pairs',
    encodeEphemeralKeyPairs(keyPairs)
  )
}
7. 配置客户端
utils/aptosClient.ts
import { Aptos, AptosConfig, Network } from '@aptos-labs/ts-sdk'

export function getAptosClient() {
  // 或者 Network.DEVNET(确保你的网络在应用程序中保持一致)
  const config = new AptosConfig({ network: Network.TESTNET })
  return new Aptos(config)
}
8. 实例化无密钥账户
callback/page.tsx
const aptosClient = getAptosClient()

const keylessAccount = await aptosClient.deriveKeylessAccount({
  jwt,
  ephemeralKeyPair,
})code:callback/page.tsx 完整代码
'use client' // 确保以下代码只在客户端执行
import { jwtDecode } from 'jwt-decode'
import { useEffect, useState } from 'react'
import { useRouter } from 'next/navigation'
import { getLocalEphemeralKeyPair } from '@/hooks/useEphemeralKeyPair'
import { getAptosClient } from '@/utils/aptosClient'
import { useKeylessAccount } from '@/context/KeylessAccountContext'
import { EphemeralKeyPair, Account } from '@aptos-labs/ts-sdk'
import { KeylessAccountProvider } from '../../context/KeylessAccountContext'

const parseJWTFromURL = (url: string): string | null => {
  const urlObject = new URL(url)
  const fragment = urlObject.hash.substring(1)
  const params = new URLSearchParams(fragment)
  console.log('id_token: ', params.get('id_token'))
  return params.get('id_token')
}

const CallbackPage = () => {
  const { setKeylessAccount } = useKeylessAccount()
  const { push } = useRouter()
  const [progress, setProgress] = useState<number>(0)
  const [hasError, setHasError] = useState<boolean>(false)

  useEffect(() => {
    // 仅在客户端执行
    async function deriveAccount() {
      const jwt = parseJWTFromURL(window.location.href)
      if (!jwt) {
        setHasError(true)
        setProgress(100)
        console.log('No JWT found in URL. Please try logging in again.')
        return
      }
      const payload = jwtDecode<{ nonce: string }>(jwt)
      const jwtNonce = payload.nonce
      const ephemeralKeyPair = getLocalEphemeralKeyPair(jwtNonce)

      if (!ephemeralKeyPair) {
        setHasError(true)
        setProgress(100)
        console.log(
          'No ephemeral key pair found for the given nonce. Please try logging in again.'
        )
        return
      }
      await createKeylessAccount(jwt, ephemeralKeyPair)

      setProgress(100)
      push('/')
    }
    deriveAccount()
  }, [])

  const createKeylessAccount = async (
    jwt: string,
    ephemeralKeyPair: EphemeralKeyPair
  ) => {
    const aptosClient = getAptosClient()
    const keylessAccount = await aptosClient.deriveKeylessAccount({
      jwt,
      ephemeralKeyPair,
    })
    console.log('Keyless Account: ', keylessAccount.accountAddress.toString())
    setKeylessAccount(keylessAccount)
  }

  return (
    <KeylessAccountProvider>
      <div className="flex items-center justify-center h-screen w-screen">
        <div className="relative flex justify-center items-center border rounded-lg px-8 py-2 shadow-sm cursor-not-allowed tracking-wider">
          <span className="absolute flex h-3 w-3 -top-1 -right-1">
            <span className="animate-ping absolute inline-flex h-full w-full rounded-full bg-green-400 opacity-75"></span>
            <span className="relative inline-flex rounded-full h-3 w-3 bg-green-500"></span>
          </span>
          Redirecting...
        </div>
      </div>
    </KeylessAccountProvider>
  )
}

export default CallbackPage
9. 使用 React Context
context/KeylessAccountContext.tsx
'use client' // 指定这个文件应该被当作客户端组件来处理。
import React, { createContext, useContext, useState } from 'react'
import { Account } from '@aptos-labs/ts-sdk'

// 定义一个上下文类型,用于管理 keyless 账户信息。
// 使用方式:在需要使用 keyless 账户的地方,使用 useKeylessAccount 钩子函数获取上下文中的 keylessAccount 变量。
interface KeylessAccountContextType {
  keylessAccount: Account | null // 当前的 keyless 账户对象,可能为 null
  setKeylessAccount: (account: Account | null) => void // 用于更新 keyless 账户对象的函数
}

// 创建一个 React 上下文,用于在组件树中传递 keyless 账户信息。
const KeylessAccountContext = createContext<
  // createContext 函数用于创建一个上下文对象
  KeylessAccountContextType | undefined // 上下文的值类型可以是 KeylessAccountContextType 或者 undefined
>(undefined) // 初始值设置为 undefined

// KeylessAccountProvider 是一个 React 函数组件,它提供了一个上下文,用于管理 keyless 账户信息。
export const KeylessAccountProvider: React.FC<{
  // React.FC 是一个泛型,用于定义函数组件的类型
  children: React.ReactNode // children 是一个 ReactNode 类型的属性,表示组件的子元素
}> = ({ children }) => {
  const [keylessAccount, setKeylessAccount] = useState<Account | null>(null) // 使用 useState 钩子创建一个状态变量和更新函数

  return (
    <KeylessAccountContext.Provider // 使用 KeylessAccountContext.Provider 提供上下文值
      value={{ keylessAccount, setKeylessAccount }} // 提供的值是 keylessAccount 和 setKeylessAccount
    >
      {children}
    </KeylessAccountContext.Provider>
  )
}

// useKeylessAccount 是一个自定义的 React 钩子,用于在组件中获取 keyless 账户信息。
export const useKeylessAccount = () => {
  const context = useContext(KeylessAccountContext)
  console.log('content', context)
  if (!context) {
    throw new Error(
      'useKeylessAccount must be used within a KeylessAccountProvider'
    )
  }
  return context // 返回上下文信息
}
10. 修改 app/layout.tsx
import type { Metadata } from 'next'
import { Inter } from 'next/font/google'
import './globals.css'
// 新增
import { PropsWithChildren } from 'react'
import { KeylessAccountProvider } from '@/context/KeylessAccountContext'

const inter = Inter({ subsets: ['latin'] })

export const metadata: Metadata = {
  title: 'Create Next App',
  description: 'Generated by create next app',
}
// 修改
export default function RootLayout({ children }: PropsWithChildren) {
  return (
    <html lang="en">
      <head>
        <meta
          name="google-site-verification"
          content="Rnm3DL87HNmPncIFwBLXPhy-WGFDXIyplSL4fRtnFsA"
        />
      </head>
      <body className={inter.className}>
        <KeylessAccountProvider>{children}</KeylessAccountProvider>
      </body>
    </html>
  )
}
11. 在根目录创建环境变量文件.env
不是
src下,而是在整个项目的根目录,因为这是个Next.js读的
NEXT_PUBLIC_GOOGLE_CLIENT_ID="4827434444444444-qe3iikf34iiiiiiiiiiiiig90.apps.googleusercontent.com"
NEXT_PUBLIC_URL=http://localhost:3000
NOTE
到目前为止,你使用 Google 账户登陆后可以应该看到这个界面
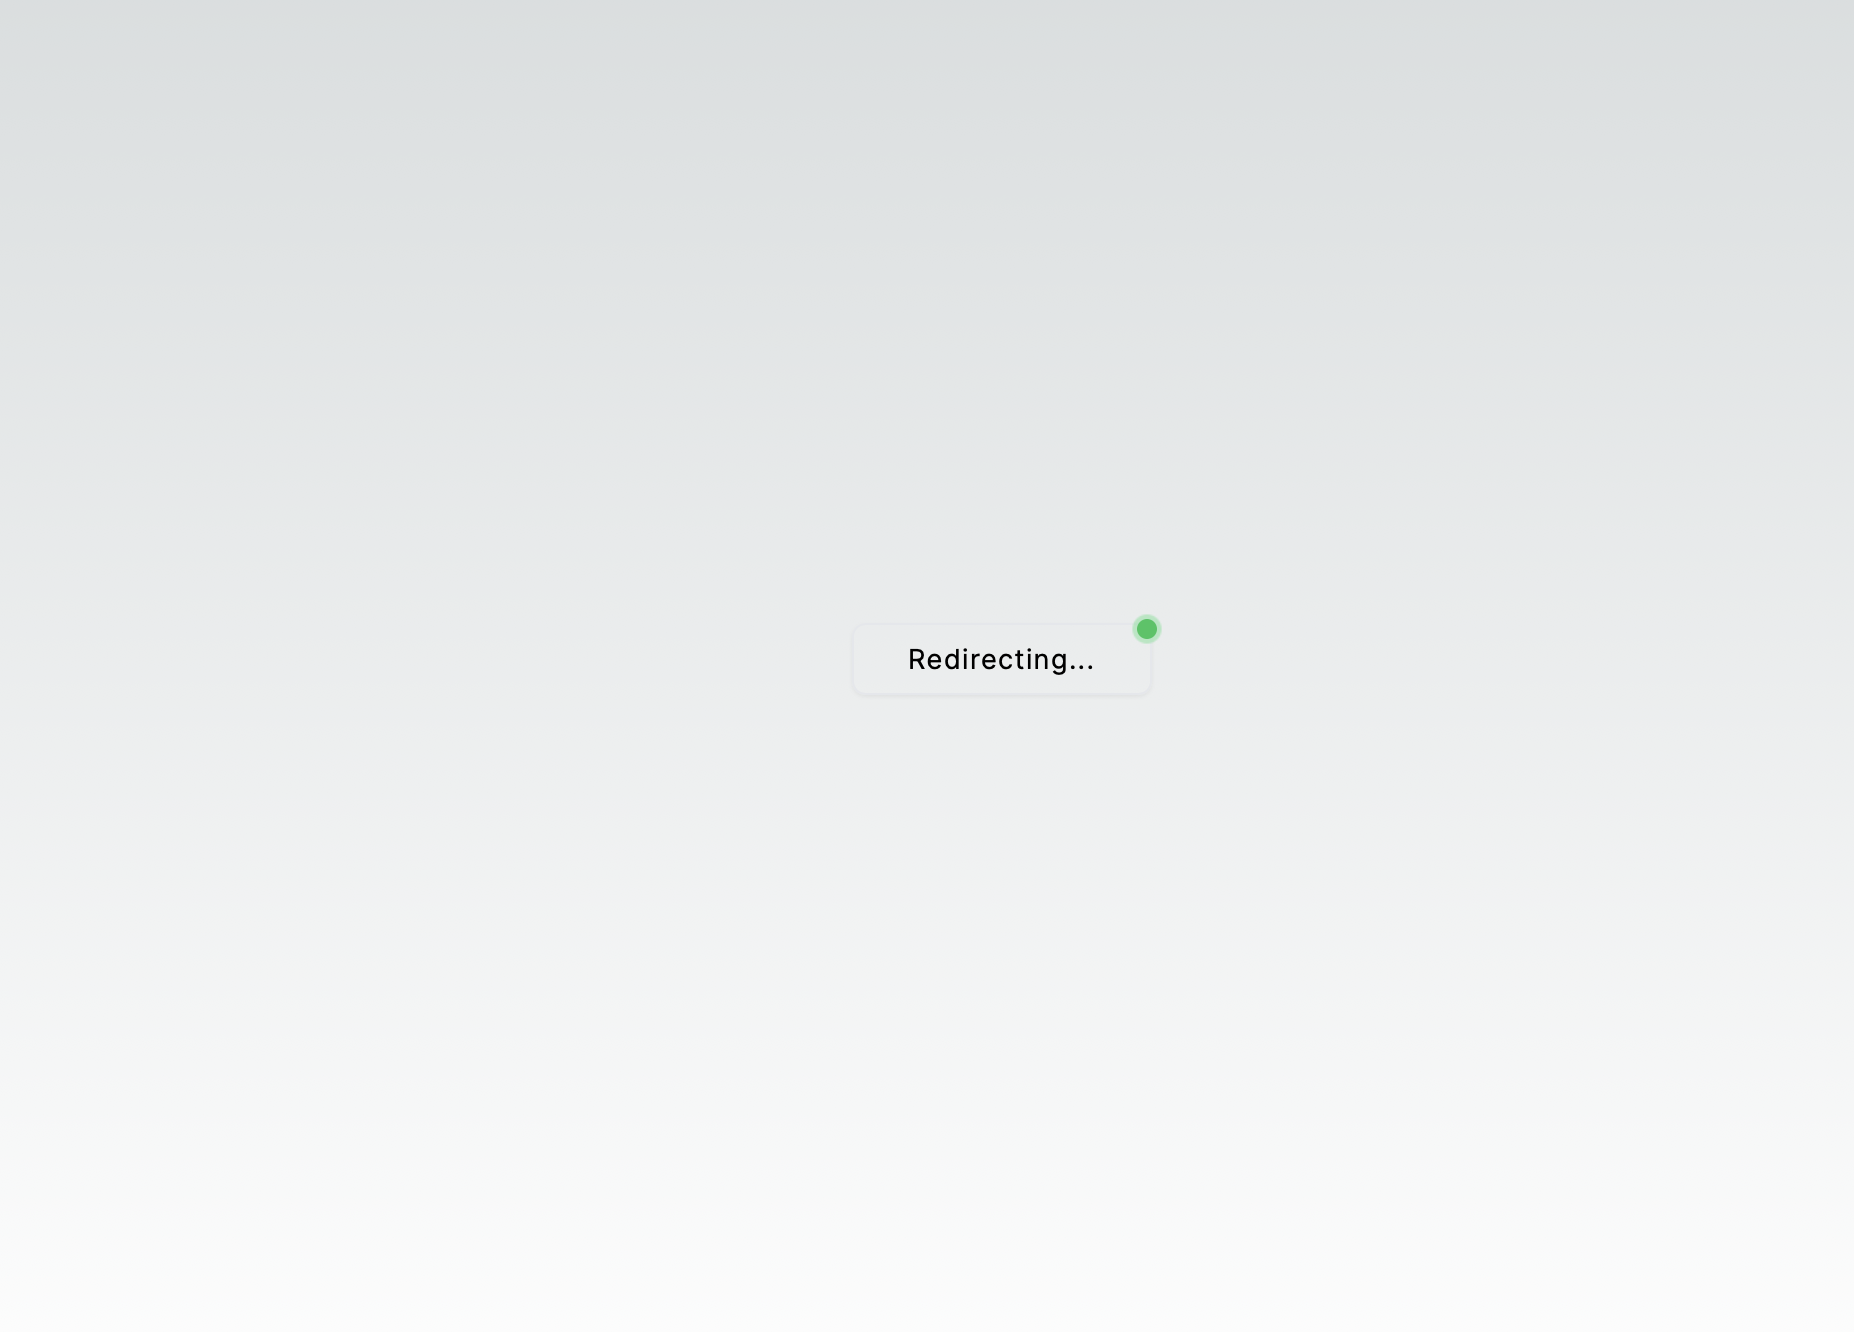
你可能会疑惑:
为什么一直显示重定向,而不是进入新的页面
因为没有获取到 nonce(phemeralKeyPair 为空),我们继续!
12. 创建 ClientOnly.tsx 文件
为了解决因
phemeralKeyPair为空,而提示再次登陆的问题
'use client'

import { PropsWithChildren, useEffect, useState } from 'react'

// 为了修复 Next.js 中客户端和服务器端 nonce 不匹配的问题,
// 我们采取了一种方法,只在客户端渲染子组件。
// 这与“use client”指令不同,因为它完全阻止了子组件在服务器端的预渲染。
// 这样可以防止 hydration 不匹配的问题。
function ClientOnly({ children }: PropsWithChildren) {
  const [hasMounted, setHasMounted] = useState(false)

  useEffect(() => {
    setHasMounted(true)
  }, [])

  if (!hasMounted) {
    return null
  }

  // eslint-disable-next-line react/jsx-no-useless-fragment
  return <>{children}</>
}

export default ClientOnly
这段代码是一个 React 组件,名为ClientOnly,它使用了 Next.js 框架的特性。这个组件的目的是解决 Next.js 在服务器端渲染(SSR)和客户端渲染(CSR)过程中可能出现的 hydration 不匹配问题。hydration 是 Next.js 在客户端将服务器端生成的 HTML 与 React 组件树进行匹配的过程。
组件的实现方式如下:
-
使用
useState钩子创建一个状态变量hasMounted,初始值为false。这个状态用于跟踪组件是否已经挂载到 DOM 上。 -
使用
useEffect钩子来设置hasMounted状态为true。这个副作用函数在组件挂载时执行一次,没有依赖项数组[],因此它只会在组件首次渲染时执行。 -
在组件的渲染函数中,首先检查
hasMounted状态。如果hasMounted为false,则返回null,这意味着在客户端渲染之前,组件不会渲染任何内容。 -
如果
hasMounted为true,则渲染children。children是传递给ClientOnly组件的子组件或元素。
这个组件的目的是确保只有在客户端渲染时,才会渲染其子组件。这样可以避免在服务器端渲染的 HTML 与客户端渲染的 React 组件树之间出现不匹配的情况,从而避免 hydration 错误。
use client指令是 Next.js 12.2 版本引入的,用于标记一个组件或文件为客户端专用,意味着该组件或文件中的代码只会在客户端执行,不会在服务器端执行。这个ClientOnly组件通过其逻辑实现了类似的功能,但没有使用use client指令,而是通过状态管理来控制渲染时机。
13. 导入 ClientOnly 更改到 page.tsx
src/app/page.tsx
import { Body } from '@/app/home/Body'
import ClientOnly from '@/components/ClientOnly'
export default function Home() {
  return (
    <>
      <div className="flex min-h-screen flex-col items-center justify-between p-24">
        <ClientOnly>
          <Body />
        </ClientOnly>
      </div>
    </>
  )
}
TIP
现在我们已经完整实现了 keyless 如果你愿意可以加一些其他的功能: 由于我们目前还没有创建页面 ——
未登陆和已登陆的界面 —— 然后还需要做判断是否登陆,以显示不同的页面,我们开始吧!大致思路是:
先把
src/app/page.tsx里面的文件移动到一个组件里面,用这个组件去判断当前的状态,然后返回给page.tsx不同的内容由于
登陆按钮的位置是固定的,所以需要单独提取出来
14. 美化一下
添加 Google Logo
components/GoogleLogo.tsx
function GoogleLogo() {
  return (
    <svg
      width="24"
      height="24"
      viewBox="0 0 24 24"
      fill="none"
      xmlns="http://www.w3.org/2000/svg"
      className="mr-2 h-5 w-5"
    >
      <path
        fillRule="evenodd"
        clipRule="evenodd"
        d="M23.54 12.7613C23.54 11.9459 23.4668 11.1618 23.3309 10.4091H12.5V14.8575H18.6891C18.4225 16.295 17.6123 17.5129 16.3943 18.3284V21.2138H20.1109C22.2855 19.2118 23.54 16.2636 23.54 12.7613Z"
        fill="#4285F4"
      />
      <path
        fillRule="evenodd"
        clipRule="evenodd"
        d="M12.4995 23.9998C15.6045 23.9998 18.2077 22.97 20.1104 21.2137L16.3938 18.3282C15.364 19.0182 14.0467 19.4259 12.4995 19.4259C9.50425 19.4259 6.96902 17.403 6.0647 14.6848H2.22266V17.6644C4.11493 21.4228 8.00402 23.9998 12.4995 23.9998Z"
        fill="#34A853"
      />
      <path
        fillRule="evenodd"
        clipRule="evenodd"
        d="M6.06523 14.6851C5.83523 13.9951 5.70455 13.2581 5.70455 12.5001C5.70455 11.7422 5.83523 11.0051 6.06523 10.3151V7.33557H2.22318C1.44432 8.88807 1 10.6444 1 12.5001C1 14.3558 1.44432 16.1122 2.22318 17.6647L6.06523 14.6851Z"
        fill="#FBBC05"
      />
      <path
        fillRule="evenodd"
        clipRule="evenodd"
        d="M12.4995 5.57386C14.1879 5.57386 15.7038 6.15409 16.8956 7.29364L20.194 3.99523C18.2024 2.13955 15.5992 1 12.4995 1C8.00402 1 4.11493 3.57705 2.22266 7.33545L6.0647 10.315C6.96902 7.59682 9.50425 5.57386 12.4995 5.57386Z"
        fill="#EA4335"
      />
    </svg>
  )
}

export default GoogleLogo
登陆和未登陆显示不同的内容
app/home/Body.tsx
'use client'

import { useKeylessAccount } from '@/context/KeylessAccountContext'
import { Connected } from './Connected'
import { NotConnected } from './NotConnected'

export function Body() {
  const { keylessAccount } = useKeylessAccount()

  if (keylessAccount) return <Connected />

  return <NotConnected />
}
已连接显示的内容
app/home/Contected.tsx
'use client'
import { useEffect, useCallback, useState } from 'react'
import { getAptosClient } from '@/utils/aptosClient'
import { useKeylessAccount } from '@/context/KeylessAccountContext'
import Header from './body/Header'
import Footer from './body/Footer'
const aptosClient = getAptosClient()
export function Connected() {
const { keylessAccount } = useKeylessAccount()
const [isLoading, setIsLoading] = useState<boolean>(false)
const [progress, setProgress] = useState<number>(0)
const fetch = useCallback(async () => {
if (!keylessAccount?.accountAddress) {
setIsLoading(true) // 如果没有账户地址,停止加载状态
return
}
setIsLoading(false) // 正在加载
try {
console.log('加载中')
} catch (error) {
// 处理错误
console.error(error)
} finally {
setIsLoading(false) // 加载结束
console.log('加载结束')
}
}, [keylessAccount, setIsLoading])
useEffect(() => {
fetch()
if (!keylessAccount?.accountAddress) return
console.log('address: ', keylessAccount.accountAddress)
}, [keylessAccount?.accountAddress])
useEffect(() => {
const interval = setInterval(() => {
setProgress((currentProgress) => {
if (currentProgress >= 100) {
clearInterval(interval)
return 100
}
return currentProgress + 1
})
}, 25)
return () => clearInterval(interval)
}, [])
return (
<>
<Header />
<div className="flex flex-col gap-3 p-3 justify-center items-center">
<div className="flex flex-col gap-3 p-3 justify-center items-center">
{isLoading ? (
<div className="nes-container with-title">
<p className="title">Loading...</p>
<progress
className="nes-progress is-primary"
value={progress}
max="100"
></progress>
</div>
) : (
<div className="nes-container with-title">
<p className="title">Connected</p>
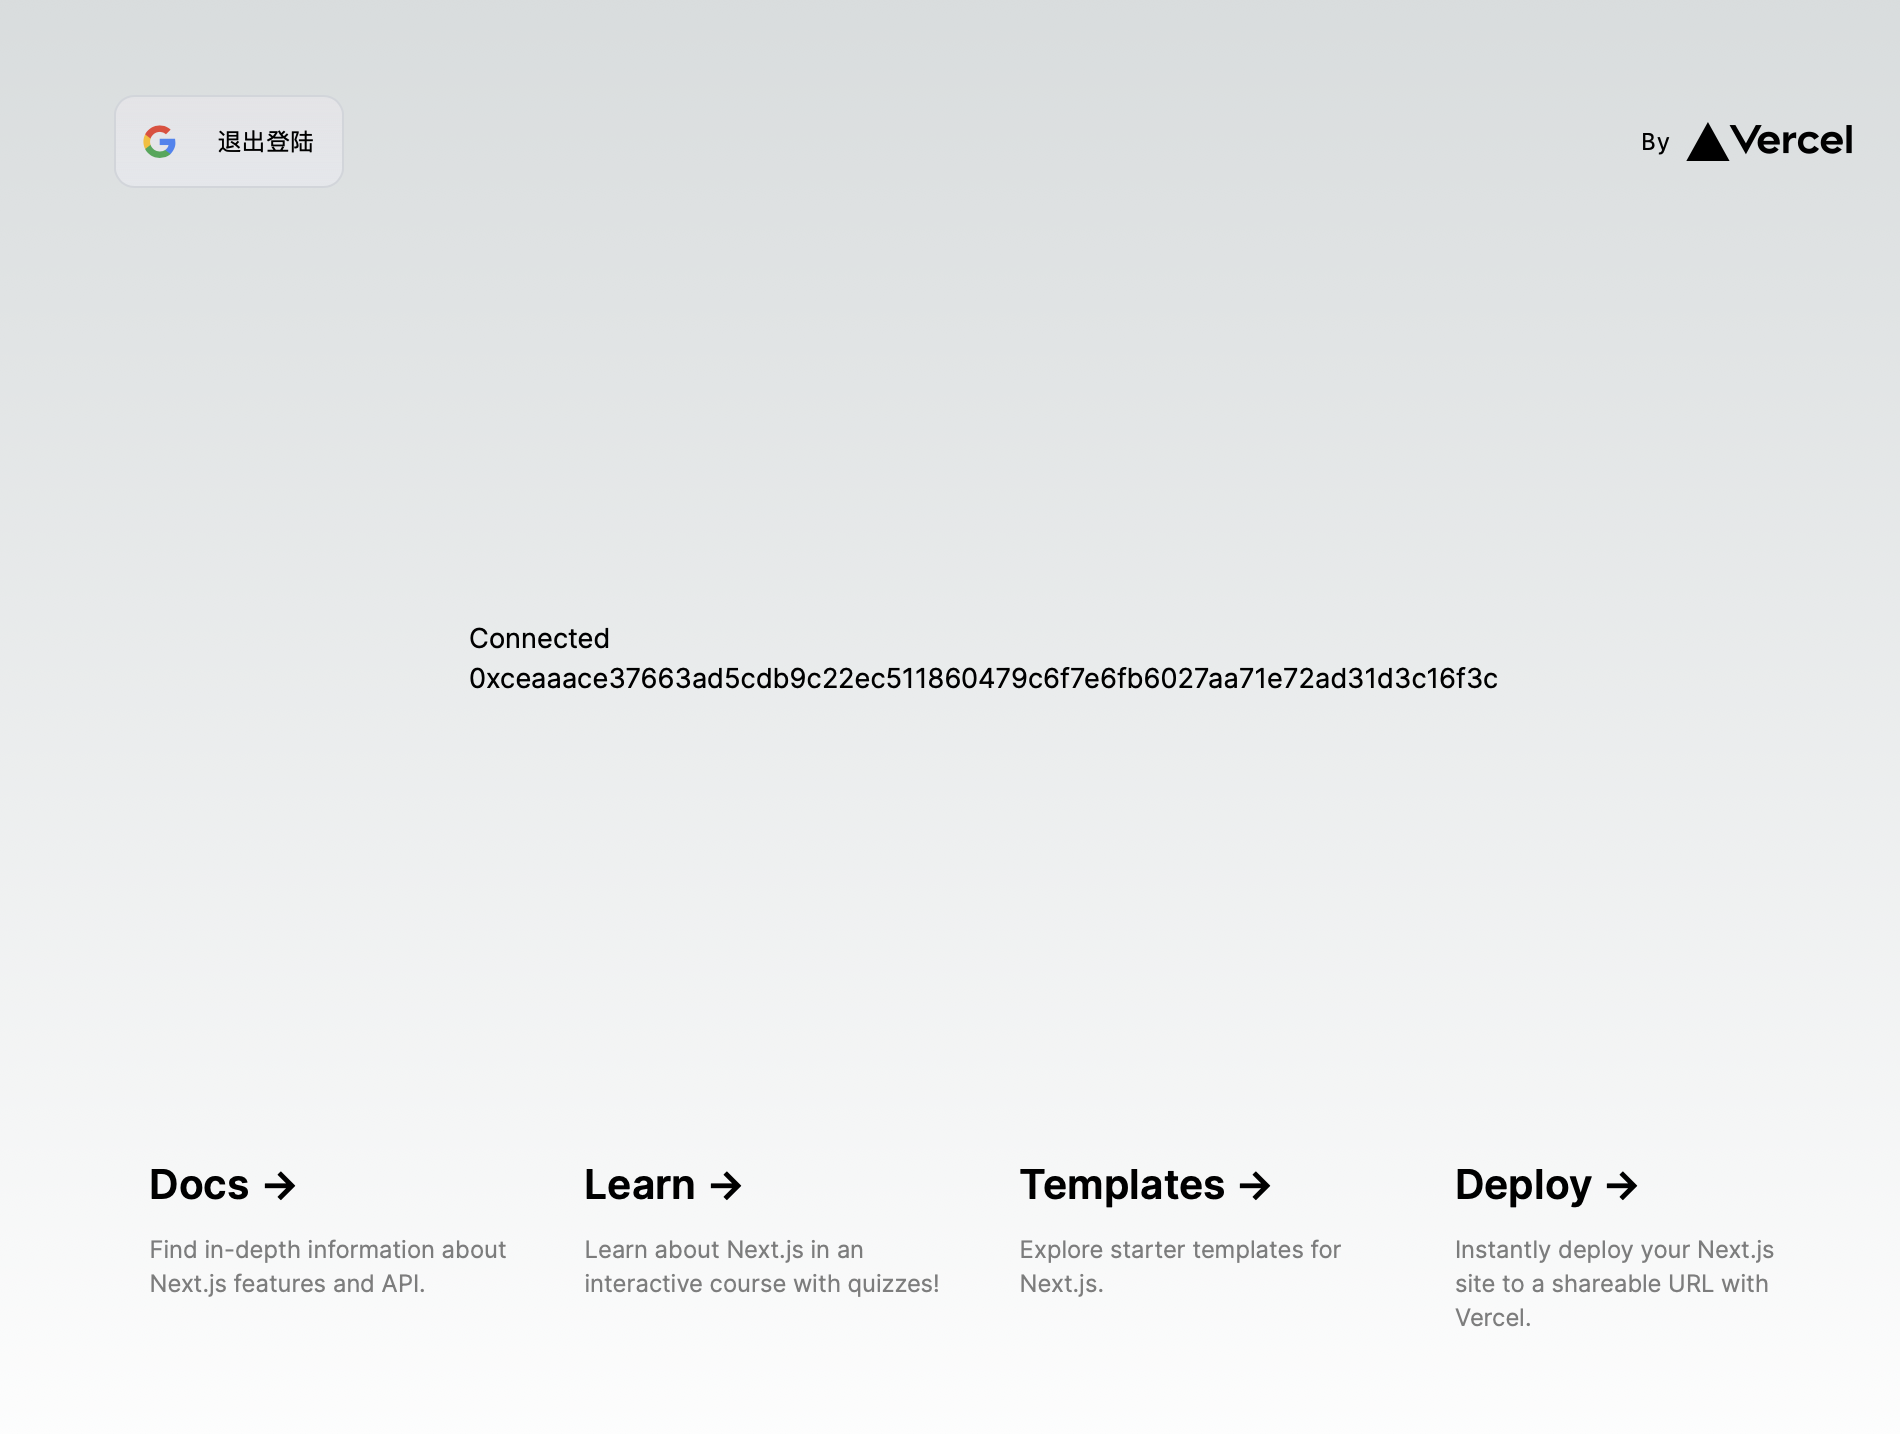
<p className="title">
{keylessAccount?.accountAddress.toString()}
</p>
</div>
)}
</div>
</div>
<Footer />
</>
)
}顶部
app/home/body/Header.tsx
import Image from 'next/image'
import WalletButtons from '@/components/WalletButtons'

export default function Header() {
  return (
    <div className="z-10 w-full max-w-5xl items-center justify-between font-mono text-sm lg:flex">
      <WalletButtons />
      <div className="fixed bottom-0 left-0 flex h-48 w-full items-end justify-center bg-gradient-to-t from-white via-white dark:from-black dark:via-black lg:static lg:size-auto lg:bg-none">
        <a
          className="pointer-events-none flex place-items-center gap-2 p-8 lg:pointer-events-auto lg:p-0"
          href="https://vercel.com?utm_source=create-next-app&utm_medium=appdir-template&utm_campaign=create-next-app"
          target="_blank"
          rel="noopener noreferrer"
        >
          By{' '}
          <Image
            src="/vercel.svg"
            alt="Vercel Logo"
            className="dark:invert"
            width={100}
            height={24}
            priority
          />
        </a>
      </div>
    </div>
  )
}
中间
app/home/body/Main.tsx
import Image from 'next/image'

export default function Header() {
  return (
    <div className="relative z-[-1] flex place-items-center before:absolute before:h-[300px] before:w-full before:-translate-x-1/2 before:rounded-full before:bg-gradient-radial before:from-white before:to-transparent before:blur-2xl before:content-[''] after:absolute after:-z-20 after:h-[180px] after:w-full after:translate-x-1/3 after:bg-gradient-conic after:from-sky-200 after:via-blue-200 after:blur-2xl after:content-[''] before:dark:bg-gradient-to-br before:dark:from-transparent before:dark:to-blue-700 before:dark:opacity-10 after:dark:from-sky-900 after:dark:via-[#0141ff] after:dark:opacity-40 sm:before:w-[480px] sm:after:w-[240px] before:lg:h-[360px]">
      <Image
        className="relative dark:drop-shadow-[0_0_0.3rem_#ffffff70] dark:invert"
        src="/next.svg"
        alt="Next.js Logo"
        width={180}
        height={37}
        priority
      />
    </div>
  )
}
底部
app/home/body/Footer.tsx
import Image from 'next/image'
export default function Footer() {
return (
<div className="mb-32 grid text-center lg:mb-0 lg:w-full lg:max-w-5xl lg:grid-cols-4 lg:text-left">
<a
href="https://nextjs.org/docs?utm_source=create-next-app&utm_medium=appdir-template&utm_campaign=create-next-app"
className="group rounded-lg border border-transparent px-5 py-4 transition-colors hover:border-gray-300 hover:bg-gray-100 hover:dark:border-neutral-700 hover:dark:bg-neutral-800/30"
target="_blank"
rel="noopener noreferrer"
>
<h2 className="mb-3 text-2xl font-semibold">
Docs{' '}
<span className="inline-block transition-transform group-hover:translate-x-1 motion-reduce:transform-none">
->
</span>
</h2>
<p className="m-0 max-w-[30ch] text-sm opacity-50">
Find in-depth information about Next.js features and API.
</p>
</a>
<a
href="https://nextjs.org/learn?utm_source=create-next-app&utm_medium=appdir-template-tw&utm_campaign=create-next-app"
className="group rounded-lg border border-transparent px-5 py-4 transition-colors hover:border-gray-300 hover:bg-gray-100 hover:dark:border-neutral-700 hover:dark:bg-neutral-800/30"
target="_blank"
rel="noopener noreferrer"
>
<h2 className="mb-3 text-2xl font-semibold">
Learn{' '}
<span className="inline-block transition-transform group-hover:translate-x-1 motion-reduce:transform-none">
->
</span>
</h2>
<p className="m-0 max-w-[30ch] text-sm opacity-50">
Learn about Next.js in an interactive course with quizzes!
</p>
</a>
<a
href="https://vercel.com/templates?framework=next.js&utm_source=create-next-app&utm_medium=appdir-template&utm_campaign=create-next-app"
className="group rounded-lg border border-transparent px-5 py-4 transition-colors hover:border-gray-300 hover:bg-gray-100 hover:dark:border-neutral-700 hover:dark:bg-neutral-800/30"
target="_blank"
rel="noopener noreferrer"
>
<h2 className="mb-3 text-2xl font-semibold">
Templates{' '}
<span className="inline-block transition-transform group-hover:translate-x-1 motion-reduce:transform-none">
->
</span>
</h2>
<p className="m-0 max-w-[30ch] text-sm opacity-50">
Explore starter templates for Next.js.
</p>
</a>
<a
href="https://vercel.com/new?utm_source=create-next-app&utm_medium=appdir-template&utm_campaign=create-next-app"
className="group rounded-lg border border-transparent px-5 py-4 transition-colors hover:border-gray-300 hover:bg-gray-100 hover:dark:border-neutral-700 hover:dark:bg-neutral-800/30"
target="_blank"
rel="noopener noreferrer"
>
<h2 className="mb-3 text-2xl font-semibold">
Deploy{' '}
<span className="inline-block transition-transform group-hover:translate-x-1 motion-reduce:transform-none">
->
</span>
</h2>
<p className="m-0 max-w-[30ch] text-balance text-sm opacity-50">
Instantly deploy your Next.js site to a shareable URL with Vercel.
</p>
</a>
</div>
)
}未连接
app/home/NotContected.tsx
'use client'
import Footer from './body/Footer'
import Header from './body/Header'
import Main from './body/Main'

import React, { useState } from 'react'

export function NotConnected() {
  return (
    <>
      <Header />
      <Main />
      <Footer />
    </>
  )
}
主页
app/page.tsx
import { Body } from '@/app/home/Body'
import ClientOnly from '@/components/ClientOnly'
export default function Home() {
  return (
    <>
      <div className="flex min-h-screen flex-col items-center justify-between p-24">
        <ClientOnly>
          <Body />
        </ClientOnly>
      </div>
    </>
  )
}
二、可能遇到的问题
”useKeylessAccount must be used within a KeylessAccountProvider”
- 检查
app/layout.tsx的配置是否正确,如果使用了(default)文件夹,那么请在该文件里面配置,即app/(default)/layout.tsx
页面空白
NOTE
务必检查是不是自己的组件没有渲染出来,我有一次就是因为组件没有被正确渲染出来,而误以为是 hook 的问题。建议的检查方法,在确定已经连接到账户的情况,仅渲染单个元素,比如账户地址,看是否能显示。(泪)
No ephemeral key pair found for the given nonce. Please try logging in again.
看一下 nonce 是不是不匹配
在callback/page.tsx 添加调试输出
const payload = jwtDecode<{ nonce: string }>(jwt)

const jwtNonce = payload.nonce

const ephemeralKeyPair = getLocalEphemeralKeyPair(jwtNonce)
console.log('jwtNonce: ', jwtNonce)
console.log('ephemeralKeyPair: ', ephemeralKeyPair)
if (!ephemeralKeyPair) {
	setHasError(true)
	setProgress(100)
	console.log(
	  'No ephemeral key pair found for the given nonce. Please try logging in again.'
	)
return
}
在 useEphemeralKeyPair.tsx 添加调试输出,
export const storeEphemeralKeyPair = (
  ephemeralKeyPair: EphemeralKeyPair,
): void => {
  // Retrieve the current ephemeral key pairs from localStorage
  const accounts = getLocalEphemeralKeyPairs();

  console.log("accounts: ",accounts)

  // Store the new ephemeral key pair in localStorage
  accounts[ephemeralKeyPair.nonce] = ephemeralKeyPair;

  if (typeof localStorage === 'undefined') return;
  localStorage.setItem(
    "ephemeral-key-pairs",
    encodeEphemeralKeyPairs(accounts),
  );
};
看本地保存的 ephemeralKeyPair 是不是和服务端保存的不同
nonce: 135439416000000000000000000000000000000000000000000000000150402128658store-ephemeralKeyPair: i {privateKey: r, publicKey: i, expiryDateSecs: 1719050400, blinder: Uint8Array(31), nonce: '135439416000000000000000000000000000000000000000000000000006342150402128658'}
local-ephemeralKeyPairs: i {privateKey: r, publicKey: i, expiryDateSecs: 1719050400, blinder: Uint8Array(31), nonce: '5917686203750125670000000000000000000000000000000000000000000557410168845959'}callback-get-local-ephemeralKeyPair: i {privateKey: r, publicKey: i, expiryDateSecs: 1719050400, blinder: Uint8Array(31), nonce: '5917686203750125000000000000000000000000000000000000000006561557410168845959'}ephemeralKeyPair 和服务端的 ephemeralKeyPair 不同,表明 ClientOnly.tsx 的配置不正确(位置)
- 通过仅在客户端渲染子组件来防止 hydration 不匹配。这与“use client”指令不同,因为它防止了子组件在服务器端的预渲染。
在 keylessAccountContent.tsx 中添加调试输出
export const useKeylessAccount = () => {
  const context = useContext(KeylessAccountContext)
  console.log('context', context)
  if (!context) {
    throw new Error(
      'useKeylessAccount must be used within a KeylessAccountProvider'
    )
  }
  return context
}
你应该可以看到 content 的值是 null 说明上下文正确,这一般是 <KeylessAccountProvider>{children}</KeylessAccountProvider> 的位置不正确
三、附录
1. app 中各个文件的作用
app
├── favicon.ico # 图标文件,通常用作浏览器标签页的图标。用户访问网站时,这个图标会显示在浏览器的地址栏旁边。
├── globals.css # 全局样式文件,它定义了整个应用的样式。在 Next.js 中,你可以使用 CSS 模块、全局样式表或 CSS-in-JS 库来编写样式。 globals.css 文件中的样式将被应用到所有页面和组件上。
├── layout.tsx # 布局组件,它定义了应用的布局结构。在 Next.js 中,布局组件可以用来包裹页面组件,以提供一致的布局和样式。布局组件通常包含导航栏、侧边栏、页脚等元素。在 Next.js 13 中,你可以使用 `app/layout.tsx` 来定义布局。
└── page.tsx # 页面组件,它代表了应用中的一个页面。在 Next.js 中,每个页面组件对应一个路由。页面组件可以包含自己的布局和样式,并且可以使用 Next.js 提供的路由和数据获取功能。
2. 代码
文件夹结构
src
├── app
│   ├── callback
│   │   └── page.tsx
│   ├── favicon.ico
│   ├── globals.css
│   ├── home
│   │   ├── Body.tsx
│   │   ├── Connected.tsx
│   │   ├── NotConnected.tsx
│   │   └── body
│   │       ├── Footer.tsx
│   │       ├── Header.tsx
│   │       └── Main.tsx
│   ├── layout.tsx
│   └── page.tsx
├── components
│   ├── ClientOnly.tsx
│   ├── GoogleLogo.tsx
│   └── WalletButtons
│       └── index.tsx
├── context
│   └── KeylessAccountContext.tsx
├── hooks
│   └── useEphemeralKeyPair.tsx
└── utils
    └── aptosClient.tsx
代码
/
.env
NEXT_PUBLIC_GOOGLE_CLIENT_ID="40632423qe3hhhhhhhhhhhhhhhddddsshhhh44hhhhg90.apps.googleusercontent.com"
NEXT_PUBLIC_URL=http://localhost:3000
src
src/app
page.tsx
import { Body } from '@/app/home/Body'
import ClientOnly from '@/components/ClientOnly'
export default function Home() {
  return (
    <>
      <div className="flex min-h-screen flex-col items-center justify-between p-24">
        <ClientOnly>
          <Body />
        </ClientOnly>
      </div>
    </>
  )
}
layout.tsx
import type { Metadata } from 'next'
import { Inter } from 'next/font/google'
import './globals.css'

import { PropsWithChildren } from 'react'
import { KeylessAccountProvider } from '@/context/KeylessAccountContext'

const inter = Inter({ subsets: ['latin'] })

export const metadata: Metadata = {
  title: 'Create Next App',
  description: 'Generated by create next app',
}
export default function RootLayout({ children }: PropsWithChildren) {
  return (
    <html lang="en">
      <head>
        <meta
          name="google-site-verification"
          content="Rnm3DL87HNmPncIFwBLXPhy-WGFDXIyplSL4fRtnFsA"
        />
      </head>
      <body className={inter.className}>
        <KeylessAccountProvider>{children}</KeylessAccountProvider>
      </body>
    </html>
  )
}
src/app/home
Body.tsx
'use client'

import { useKeylessAccount } from '@/context/KeylessAccountContext'
import { Connected } from './Connected'
import { NotConnected } from './NotConnected'

export function Body() {
  const { keylessAccount } = useKeylessAccount()

  if (keylessAccount) return <Connected />

  return <NotConnected />
}
Connected.tsx
'use client'

import { useEffect, useCallback, useState } from 'react'
import { getAptosClient } from '@/utils/aptosClient'
import { useKeylessAccount } from '@/context/KeylessAccountContext'
import Header from './body/Header'
import Footer from './body/Footer'

const aptosClient = getAptosClient()

export function Connected() {
  const { keylessAccount } = useKeylessAccount()

  const [isLoading, setIsLoading] = useState<boolean>(false)
  const [progress, setProgress] = useState<number>(0)

  const fetch = useCallback(async () => {
    if (!keylessAccount?.accountAddress) {
      setIsLoading(true) // 如果没有账户地址,停止加载状态
      return
    }
    setIsLoading(false) // 正在加载
    try {
      console.log('加载中')
    } catch (error) {
      // 处理错误
      console.error(error)
    } finally {
      setIsLoading(false) // 加载结束
      console.log('加载结束')
    }
  }, [keylessAccount, setIsLoading])

  useEffect(() => {
    fetch()
    if (!keylessAccount?.accountAddress) return
    console.log('address: ', keylessAccount.accountAddress)
  }, [keylessAccount?.accountAddress])

  useEffect(() => {
    const interval = setInterval(() => {
      setProgress((currentProgress) => {
        if (currentProgress >= 100) {
          clearInterval(interval)
          return 100
        }
        return currentProgress + 1
      })
    }, 25)

    return () => clearInterval(interval)
  }, [])

  return (
    <>
      <Header />
      <div className="flex flex-col gap-3 p-3 justify-center items-center">
        <div className="flex flex-col gap-3 p-3 justify-center items-center">
          {isLoading ? (
            <div className="nes-container with-title">
              <p className="title">Loading...</p>
              <progress
                className="nes-progress is-primary"
                value={progress}
                max="100"
              ></progress>
            </div>
          ) : (
            <div className="nes-container with-title">
              <p className="title">Connected</p>
              <p className="title">
                {keylessAccount?.accountAddress.toString()}
              </p>
            </div>
          )}
        </div>
      </div>
      <Footer />
    </>
  )
}
NotConnected.tsx
'use client'
import Footer from './body/Footer'
import Header from './body/Header'
import Main from './body/Main'

import React, { useState } from 'react'

export function NotConnected() {
  return (
    <>
      <Header />
      <Main />
      <Footer />
    </>
  )
}Header.tsx
import Image from 'next/image'
import WalletButtons from '@/components/WalletButtons'

export default function Header() {
  return (
    <div className="z-10 w-full max-w-5xl items-center justify-between font-mono text-sm lg:flex">
      <WalletButtons />
      <div className="fixed bottom-0 left-0 flex h-48 w-full items-end justify-center bg-gradient-to-t from-white via-white dark:from-black dark:via-black lg:static lg:size-auto lg:bg-none">
        <a
          className="pointer-events-none flex place-items-center gap-2 p-8 lg:pointer-events-auto lg:p-0"
          href="https://vercel.com?utm_source=create-next-app&utm_medium=appdir-template&utm_campaign=create-next-app"
          target="_blank"
          rel="noopener noreferrer"
        >
          By{' '}
          <Image
            src="/vercel.svg"
            alt="Vercel Logo"
            className="dark:invert"
            width={100}
            height={24}
            priority
          />
        </a>
      </div>
    </div>
  )
}
Main.tsx
import Image from 'next/image'

export default function Header() {
  return (
    <div className="relative z-[-1] flex place-items-center before:absolute before:h-[300px] before:w-full before:-translate-x-1/2 before:rounded-full before:bg-gradient-radial before:from-white before:to-transparent before:blur-2xl before:content-[''] after:absolute after:-z-20 after:h-[180px] after:w-full after:translate-x-1/3 after:bg-gradient-conic after:from-sky-200 after:via-blue-200 after:blur-2xl after:content-[''] before:dark:bg-gradient-to-br before:dark:from-transparent before:dark:to-blue-700 before:dark:opacity-10 after:dark:from-sky-900 after:dark:via-[#0141ff] after:dark:opacity-40 sm:before:w-[480px] sm:after:w-[240px] before:lg:h-[360px]">
      <Image
        className="relative dark:drop-shadow-[0_0_0.3rem_#ffffff70] dark:invert"
        src="/next.svg"
        alt="Next.js Logo"
        width={180}
        height={37}
        priority
      />
    </div>
  )
}
Footer.tsx
import Image from 'next/image'
export default function Footer() {
return (
<div className="mb-32 grid text-center lg:mb-0 lg:w-full lg:max-w-5xl lg:grid-cols-4 lg:text-left">
<a
href="https://nextjs.org/docs?utm_source=create-next-app&utm_medium=appdir-template&utm_campaign=create-next-app"
className="group rounded-lg border border-transparent px-5 py-4 transition-colors hover:border-gray-300 hover:bg-gray-100 hover:dark:border-neutral-700 hover:dark:bg-neutral-800/30"
target="_blank"
rel="noopener noreferrer"
>
<h2 className="mb-3 text-2xl font-semibold">
Docs{' '}
<span className="inline-block transition-transform group-hover:translate-x-1 motion-reduce:transform-none">
->
</span>
</h2>
<p className="m-0 max-w-[30ch] text-sm opacity-50">
Find in-depth information about Next.js features and API.
</p>
</a>
<a
href="https://nextjs.org/learn?utm_source=create-next-app&utm_medium=appdir-template-tw&utm_campaign=create-next-app"
className="group rounded-lg border border-transparent px-5 py-4 transition-colors hover:border-gray-300 hover:bg-gray-100 hover:dark:border-neutral-700 hover:dark:bg-neutral-800/30"
target="_blank"
rel="noopener noreferrer"
>
<h2 className="mb-3 text-2xl font-semibold">
Learn{' '}
<span className="inline-block transition-transform group-hover:translate-x-1 motion-reduce:transform-none">
->
</span>
</h2>
<p className="m-0 max-w-[30ch] text-sm opacity-50">
Learn about Next.js in an interactive course with quizzes!
</p>
</a>
<a
href="https://vercel.com/templates?framework=next.js&utm_source=create-next-app&utm_medium=appdir-template&utm_campaign=create-next-app"
className="group rounded-lg border border-transparent px-5 py-4 transition-colors hover:border-gray-300 hover:bg-gray-100 hover:dark:border-neutral-700 hover:dark:bg-neutral-800/30"
target="_blank"
rel="noopener noreferrer"
>
<h2 className="mb-3 text-2xl font-semibold">
Templates{' '}
<span className="inline-block transition-transform group-hover:translate-x-1 motion-reduce:transform-none">
->
</span>
</h2>
<p className="m-0 max-w-[30ch] text-sm opacity-50">
Explore starter templates for Next.js.
</p>
</a>
<a
href="https://vercel.com/new?utm_source=create-next-app&utm_medium=appdir-template&utm_campaign=create-next-app"
className="group rounded-lg border border-transparent px-5 py-4 transition-colors hover:border-gray-300 hover:bg-gray-100 hover:dark:border-neutral-700 hover:dark:bg-neutral-800/30"
target="_blank"
rel="noopener noreferrer"
>
<h2 className="mb-3 text-2xl font-semibold">
Deploy{' '}
<span className="inline-block transition-transform group-hover:translate-x-1 motion-reduce:transform-none">
->
</span>
</h2>
<p className="m-0 max-w-[30ch] text-balance text-sm opacity-50">
Instantly deploy your Next.js site to a shareable URL with Vercel.
</p>
</a>
</div>
)
}src/app/callback
Page.tsx
'use client'

import { useEffect, useState } from 'react'
import { jwtDecode } from 'jwt-decode'
import { getLocalEphemeralKeyPair } from '@/hooks/useEphemeralKeyPair'
import { useRouter } from 'next/navigation'
import { getAptosClient } from '@/utils/aptosClient'
import { EphemeralKeyPair } from '@aptos-labs/ts-sdk'
import { useKeylessAccount } from '@/context/KeylessAccountContext'
// import { toast } from 'sonner'

const parseJWTFromURL = (url: string): string | null => {
  const urlObject = new URL(url)
  const fragment = urlObject.hash.substring(1)
  const params = new URLSearchParams(fragment)
  return params.get('id_token')
}

function CallbackPage() {
  const { setKeylessAccount } = useKeylessAccount()
  const { push } = useRouter()

  const [progress, setProgress] = useState<number>(0)
  const [hasError, setHasError] = useState<boolean>(false)

  useEffect(() => {
    const interval = setInterval(() => {
      setProgress((currentProgress) => {
        if (currentProgress >= 100) {
          clearInterval(interval)
          return 100
        }
        return currentProgress + 1
      })
    }, 50)

    async function deriveAccount() {
      const jwt = parseJWTFromURL(window.location.href)

      if (!jwt) {
        setHasError(true)
        setProgress(100)
        console.log('No JWT found in URL. Please try logging in again.')
        return
      }

      const payload = jwtDecode<{ nonce: string }>(jwt)

      const jwtNonce = payload.nonce

      const ephemeralKeyPair = getLocalEphemeralKeyPair(jwtNonce)
      console.log('jwtNonce: ', jwtNonce)

      if (!ephemeralKeyPair) {
        setHasError(true)
        setProgress(100)
        console.log(
          'No ephemeral key pair found for the given nonce. Please try logging in again.'
        )
        return
      }

      await createKeylessAccount(jwt, ephemeralKeyPair)
      clearInterval(interval)
      setProgress(100)
      push('/')
    }

    deriveAccount()
  }, [])

  const createKeylessAccount = async (
    jwt: string,
    ephemeralKeyPair: EphemeralKeyPair
  ) => {
    const aptosClient = getAptosClient()
    const keylessAccount = await aptosClient.deriveKeylessAccount({
      jwt,
      ephemeralKeyPair,
    })

    const accountCoinsData = await aptosClient.getAccountCoinsData({
      accountAddress: keylessAccount?.accountAddress.toString(),
    })
    // account does not exist yet -> fund it
    if (accountCoinsData.length === 0) {
      try {
        await aptosClient.fundAccount({
          accountAddress: keylessAccount.accountAddress,
          amount: 200000000, // faucet 2 APT to create the account
        })
      } catch (error) {
        console.log('Error funding account: ', error)
        console.log(
          'Failed to fund account. Please try logging in again or use another account.'
        )
      }
    }

    console.log('Keyless Account: ', keylessAccount.accountAddress.toString())
    setKeylessAccount(keylessAccount)
  }

  return (
    <div className="flex items-center justify-center h-screen w-screen">
      <div className="nes-container is-rounded shadow-md cursor-not-allowed bg-gray-200">
        <h1>正在加载你的链上账户...</h1>
        <br />
        <progress
          className={`nes-progress ${hasError ? 'is-error' : 'is-primary'}`}
          value={progress}
          max="100"
        ></progress>
      </div>
    </div>
  )
}

export default CallbackPage
src/compnents
ClientOnly.tsx
'use client'

import { PropsWithChildren, useEffect, useState } from 'react'

function ClientOnly({ children }: PropsWithChildren) {
const [hasMounted, setHasMounted] = useState(false)

useEffect(() => {
setHasMounted(true)
}, [])

if (!hasMounted) {
return null
}

// eslint-disable-next-line react/jsx-no-useless-fragment
return <>{children}</>
}

export default ClientOnly
GoogleLogo.tsx
function GoogleLogo() {
  return (
    <svg
      width="24"
      height="24"
      viewBox="0 0 24 24"
      fill="none"
      xmlns="http://www.w3.org/2000/svg"
      className="mr-2 h-5 w-5"
    >
      <path
        fillRule="evenodd"
        clipRule="evenodd"
        d="M23.54 12.7613C23.54 11.9459 23.4668 11.1618 23.3309 10.4091H12.5V14.8575H18.6891C18.4225 16.295 17.6123 17.5129 16.3943 18.3284V21.2138H20.1109C22.2855 19.2118 23.54 16.2636 23.54 12.7613Z"
        fill="#4285F4"
      />
      <path
        fillRule="evenodd"
        clipRule="evenodd"
        d="M12.4995 23.9998C15.6045 23.9998 18.2077 22.97 20.1104 21.2137L16.3938 18.3282C15.364 19.0182 14.0467 19.4259 12.4995 19.4259C9.50425 19.4259 6.96902 17.403 6.0647 14.6848H2.22266V17.6644C4.11493 21.4228 8.00402 23.9998 12.4995 23.9998Z"
        fill="#34A853"
      />
      <path
        fillRule="evenodd"
        clipRule="evenodd"
        d="M6.06523 14.6851C5.83523 13.9951 5.70455 13.2581 5.70455 12.5001C5.70455 11.7422 5.83523 11.0051 6.06523 10.3151V7.33557H2.22318C1.44432 8.88807 1 10.6444 1 12.5001C1 14.3558 1.44432 16.1122 2.22318 17.6647L6.06523 14.6851Z"
        fill="#FBBC05"
      />
      <path
        fillRule="evenodd"
        clipRule="evenodd"
        d="M12.4995 5.57386C14.1879 5.57386 15.7038 6.15409 16.8956 7.29364L20.194 3.99523C18.2024 2.13955 15.5992 1 12.4995 1C8.00402 1 4.11493 3.57705 2.22266 7.33545L6.0647 10.315C6.96902 7.59682 9.50425 5.57386 12.4995 5.57386Z"
        fill="#EA4335"
      />
    </svg>
  );
}

export default GoogleLogo;
src/components/WalletButtons/
index.tsx
'use client'

import useEphemeralKeyPair from '@/hooks/useEphemeralKeyPair'
import { useKeylessAccount } from '@/context/KeylessAccountContext'
import GoogleLogo from '../GoogleLogo'

const aStyles =
  'border-b border-gray-300 bg-gradient-to-b from-zinc-200 pb-6 pt-8 backdrop-blur-2xl dark:border-neutral-800 dark:bg-zinc-800/30 dark:from-inherit lg:static lg:w-auto  lg:rounded-xl lg:border lg:bg-gray-200 lg:p-4 lg:dark:bg-zinc-800/30 nes-btn flex items-center justify-center md:gap-4 py-2 flex-nowrap whitespace-nowrap'

export default function WalletButtons() {
  const { keylessAccount, setKeylessAccount } = useKeylessAccount()
  const ephemeralKeyPair = useEphemeralKeyPair()
  console.log('临时密钥是:', ephemeralKeyPair.nonce)
  const redirectUrl = new URL('https://accounts.google.com/o/oauth2/v2/auth')
  const searchParams = new URLSearchParams({
    // 请替换为您的客户端ID
    client_id: process.env.NEXT_PUBLIC_GOOGLE_CLIENT_ID,
    // redirect_uri 必须在Google开发者控制台中注册。此回调页面解析URL片段中的id_token,并将其与临时密钥对结合以派生无密钥账户。
    redirect_uri:
      typeof window !== 'undefined'
        ? `${window.location.origin}/callback`
        : (process.env.NODE_ENV === 'development'
            ? 'http://localhost:3000'
            : process.env.NEXT_PUBLIC_URL) + '/callback',
    // 这使用了 OpenID Connect 隐式流返回 id_token。这对于单页应用(SPA)是推荐的,因为它不需要后端服务器。
    response_type: 'id_token',
    scope: 'openid email profile',
    nonce: ephemeralKeyPair.nonce,
  })
  redirectUrl.search = searchParams.toString()
  console.log('url is: ', searchParams.toString())
  const disconnect = () => {
    setKeylessAccount(null)
    // toast.success("Successfully disconnected account");
  }

  if (keylessAccount) {
    console.log('aptos address: ', keylessAccount.accountAddress.toString())
    return (
      <a className={aStyles} onClick={disconnect}>
        <GoogleLogo />
        <p>退出登陆</p>

        {/* <p>{keylessAccount.accountAddress.toString()}</p> */}
      </a>
    )
  }

  return (
    <>
      <a href={redirectUrl.toString()} className={aStyles}>
        <GoogleLogo />
        使用 Google 账户登陆
      </a>
    </>
  )
}
src/context/
KeylessAccountContext.tsx
'use client' // 指定这个文件应该被当作客户端组件来处理。
import React, { createContext, useContext, useState } from 'react'
import { Account } from '@aptos-labs/ts-sdk'

interface KeylessAccountContextType {
  keylessAccount: Account | null
  setKeylessAccount: (account: Account | null) => void
}

const KeylessAccountContext = createContext<
  KeylessAccountContextType | undefined
>(undefined)

export const KeylessAccountProvider: React.FC<{
  children: React.ReactNode
}> = ({ children }) => {
  const [keylessAccount, setKeylessAccount] = useState<Account | null>(null)
  return (
    <KeylessAccountContext.Provider
      value={{ keylessAccount, setKeylessAccount }}
    >
      {children}
    </KeylessAccountContext.Provider>
  )
}

export const useKeylessAccount = () => {
  const context = useContext(KeylessAccountContext)
  console.log('content', context?.keylessAccount)
  if (!context) {
    throw new Error(
      'useKeylessAccount must be used within a KeylessAccountProvider'
    )
  }
  return context
}
src/hooks
useEphemeralKeyPair.ts
import { EphemeralKeyPair } from '@aptos-labs/ts-sdk';

/**
 * Stored ephemeral key pairs in localStorage (nonce -> ephemeralKeyPair)
 */
export type StoredEphemeralKeyPairs = { [nonce: string]: EphemeralKeyPair };

/**
 * Retrieve the ephemeral key pair with the given nonce from localStorage.
 */
export const getLocalEphemeralKeyPair = (
  nonce: string,
): EphemeralKeyPair | null => {
  const keyPairs = getLocalEphemeralKeyPairs();

  // Get the account with the given nonce (the generated nonce of the ephemeral key pair may not match
  // the nonce in localStorage), so we need to validate it before returning it (implementation specific).
  const ephemeralKeyPair = keyPairs[nonce];
  if (!ephemeralKeyPair) return null;

  // If the account is valid, return it, otherwise remove it from the device and return null
  return validateEphemeralKeyPair(nonce, ephemeralKeyPair);
};

/**
 * Validate the ephemeral key pair with the given nonce and the expiry timestamp. If the nonce does not match
 * the generated nonce of the ephemeral key pair, the ephemeral key pair is removed from localStorage. This is
 * to validate that the nonce algorithm is the same (e.g. if the nonce algorithm changes).
 */
export const validateEphemeralKeyPair = (
  nonce: string,
  ephemeralKeyPair: EphemeralKeyPair,
): EphemeralKeyPair | null => {
  // Check the nonce and the expiry timestamp of the account to see if it is valid
  if (
    nonce === ephemeralKeyPair.nonce &&
    ephemeralKeyPair.expiryDateSecs > BigInt(Math.floor(Date.now() / 1000))
  ) {
    return ephemeralKeyPair;
  }
  removeEphemeralKeyPair(nonce);
  return null;
};

/**
 * Remove the ephemeral key pair with the given nonce from localStorage.
 */
export const removeEphemeralKeyPair = (nonce: string): void => {
  const keyPairs = getLocalEphemeralKeyPairs();
  delete keyPairs[nonce];
  localStorage.setItem(
    "ephemeral-key-pairs",
    encodeEphemeralKeyPairs(keyPairs),
  );
};

/**
 * Retrieve all ephemeral key pairs from localStorage and decode them. The new ephemeral key pair
 * is then stored in localStorage with the nonce as the key.
 */
export const storeEphemeralKeyPair = (
  ephemeralKeyPair: EphemeralKeyPair,
): void => {
  // Retrieve the current ephemeral key pairs from localStorage
  const accounts = getLocalEphemeralKeyPairs();

  // Store the new ephemeral key pair in localStorage
  accounts[ephemeralKeyPair.nonce] = ephemeralKeyPair;

  if (typeof localStorage === 'undefined') return;
  localStorage.setItem(
    "ephemeral-key-pairs",
    encodeEphemeralKeyPairs(accounts),
  );
};

/**
 * Retrieve all ephemeral key pairs from localStorage and decode them.
 */
export const getLocalEphemeralKeyPairs = (): StoredEphemeralKeyPairs => {
  const rawEphemeralKeyPairs = typeof localStorage !== 'undefined' ? localStorage.getItem("ephemeral-key-pairs") : null;
  try {
    return rawEphemeralKeyPairs
      ? decodeEphemeralKeyPairs(rawEphemeralKeyPairs)
      : {};
  } catch (error) {
    // eslint-disable-next-line no-console
    console.warn(
      "Failed to decode ephemeral key pairs from localStorage",
      error,
    );
    return {};
  }
};

/**
 * Encoding for the EphemeralKeyPair class to be stored in localStorage
 */
const EphemeralKeyPairEncoding = {
  decode: (e: any) => EphemeralKeyPair.fromBytes(e.data),
  encode: (e: EphemeralKeyPair) => ({ __type: 'EphemeralKeyPair', data: e.bcsToBytes() }),
};

/**
 * Stringify the ephemeral key pairs to be stored in localStorage
 */
export const encodeEphemeralKeyPairs = (
  keyPairs: StoredEphemeralKeyPairs,
): string =>
  JSON.stringify(keyPairs, (_, e) => {
    if (typeof e === "bigint") return { __type: "bigint", value: e.toString() };
    if (e instanceof Uint8Array)
      return { __type: "Uint8Array", value: Array.from(e) };
    if (e instanceof EphemeralKeyPair)
      return EphemeralKeyPairEncoding.encode(e);
    return e;
  });

/**
 * Parse the ephemeral key pairs from a string
 */
export const decodeEphemeralKeyPairs = (
  encodedEphemeralKeyPairs: string,
): StoredEphemeralKeyPairs =>
  JSON.parse(encodedEphemeralKeyPairs, (_, e) => {
    if (e && e.__type === "bigint") return BigInt(e.value);
    if (e && e.__type === "Uint8Array") return new Uint8Array(e.value);
    if (e && e.__type === "EphemeralKeyPair")
      return EphemeralKeyPairEncoding.decode(e);
    return e;
  });

export default function useEphemeralKeyPair() {
  const ephemeralKeyPair = EphemeralKeyPair.generate();
  storeEphemeralKeyPair(ephemeralKeyPair);

  return ephemeralKeyPair;
}
src/utils
aptosClient.tsx
import { Aptos, AptosConfig, Network } from '@aptos-labs/ts-sdk'

export function getAptosClient() {
  // 或者 Network.DEVNET(确保你的网络在应用程序中保持一致)
  const config = new AptosConfig({ network: Network.TESTNET })
  return new Aptos(config)
}
Tailwind CSS
Tailwind CSS 是一个实用优先的 CSS 框架,它提供了一套低级的、原子化的类,可以用来快速构建响应式布局和组件。
Next.js 中的路由
Next.js 是一个流行的 React 框架,它提供了两种不同的路由系统:app 路由器和 pages 路由器。这两种路由器在 Next.js 的不同版本中被引入,以提供不同的路由和页面组织方式。
Pages 路由器
pages 路由器是 Next.js 最初的路由系统,它基于文件系统。在 Next.js 12 之前的版本中,pages 路由器是默认的路由系统。使用 pages 路由器时,Next.js 会根据文件系统中的文件结构来自动创建路由。
- 文件系统路由:每个页面组件都对应一个文件,文件的路径决定了页面的路由。例如,
pages/about.js会映射到/about路径。 - 页面组件:页面组件是普通的 React 组件,Next.js 会自动处理页面的服务器端渲染(SSR)和静态生成(SSG)。
- 预渲染:Next.js 支持静态生成(SSG)和服务器端渲染(SSR),可以为每个页面选择合适的预渲染方式。
- 数据获取:Next.js 提供了
getStaticProps、getServerSideProps和getInitialProps等方法来在页面组件中获取数据。
App 路由器
app 路由器是 Next.js 12 引入的新路由系统,它提供了一种更灵活的方式来组织和管理页面和布局。app 路由器使用文件系统来组织页面和布局,但提供了更多的功能和灵活性。
- 文件系统路由:
app路由器同样基于文件系统,但提供了更多的文件夹和文件类型,如layout、page、loading、error等,允许开发者创建更复杂的页面结构。 - 布局和页面:
app路由器引入了布局的概念,允许开发者创建可复用的布局组件,这些布局组件可以包裹页面组件,实现页面的布局复用。 - 数据获取:
app路由器提供了loader函数,用于在服务器端获取数据,类似于getServerSideProps,但更加灵活。 - 客户端数据获取:
app路由器支持在客户端使用useEffect或useLayoutEffect来获取数据,这使得数据获取更加灵活。 - 预渲染:
app路由器支持预渲染,但提供了更多的预渲染选项,如server、client和hybrid,允许开发者根据页面的需求选择不同的预渲染方式。
总的来说,app 路由器提供了更多的灵活性和功能,允许开发者创建更加复杂和动态的页面结构。而 pages 路由器则更加简单直接,适合快速开发和部署静态页面。随着 Next.js 的发展,app 路由器逐渐成为推荐的路由方式。
app 路由
https://nextjs.org/docs/app/building-your-application/routing
在 Next.js 中,app 路由器是 Next.js 13 引入的新特性,它提供了一种新的文件系统路由方式,允许开发者以更模块化和可重用的方式组织页面和布局。app 路由器使用文件夹和文件名来定义路由,而不是使用 pages 文件夹中的文件。
使用方法
-
创建布局文件:在
app文件夹中创建_layout.js文件,用于定义全局布局。例如,你可以创建一个包含导航栏和侧边栏的布局。 -
创建页面文件:在
app文件夹中创建页面文件,如index.js、about.js等。这些文件将自动成为路由。 -
使用数据获取:Next.js 提供了
use前缀的钩子,如useEffect、useReducer等,用于在组件中进行数据获取和状态管理。 -
使用服务器组件:Next.js 13 引入了服务器组件的概念,这些组件在服务器端渲染,可以访问数据库和后端服务。
-
使用客户端组件:客户端组件在客户端渲染,可以用于实现交互式功能。
-
使用
app路由器的中间件:可以使用middleware.js文件来定义路由中间件,用于处理路由逻辑。
文件作用分析
-
_app.js:这是 Next.js 应用的根组件,可以用来包裹所有页面,添加全局样式或状态管理。 -
_document.js:用于自定义 HTML 文档结构,如<html>、<head>和<body>标签。 -
_layout.js:定义了页面的布局,可以包含导航栏、侧边栏等。 -
page.js:定义了具体的页面内容。 -
middleware.js:定义了路由中间件,可以用来处理路由逻辑,如权限验证。
带登录功能的博客网站示例
以下是一个简单的带登录功能的博客网站示例,使用 Next.js 13 的 app 路由器。
- _app.js - 应用根组件,包含全局样式和状态管理。
import '../styles/globals.css'

export default function App({ Component, pageProps }) {
  return <Component {...pageProps} />
}- _layout.js - 定义博客网站的布局。
import Navbar from './navbar'
import Footer from './footer'

export default function RootLayout({ children }) {
  return (
    <html lang="en">
      <head>
        <title>My Blog</title>
      </head>
      <body>
        <Navbar />
        {children}
        <Footer />
      </body>
    </html>
  )
}- pages/index.js - 首页,展示博客文章列表。
import { getPosts } from '../lib/posts'

export default function Home({ posts }) {
  return (
    <div>
      <h1>Welcome to My Blog</h1>
      <ul>
        {posts.map((post) => (
          <li key={post.id}>{post.title}</li>
        ))}
      </ul>
    </div>
  )
}

export async function getStaticProps() {
  const posts = await getPosts()
  return {
    props: {
      posts,
    },
  }
}- pages/login.js - 登录页面。
import { useState } from 'react'

export default function Login() {
  const [username, setUsername] = useState('')
  const [password, setPassword] = useState('')

  const handleSubmit = async (e) => {
    e.preventDefault()
    // 这里应该有登录逻辑,验证用户名和密码
    // 假设登录成功
    alert('Login successful!')
  }

  return (
    <form onSubmit={handleSubmit}>
      <input
        type="text"
        placeholder="Username"
        value={username}
        onChange={(e) => setUsername(e.target.value)}
      />
      <input
        type="password"
        placeholder="Password"
        value={password}
        onChange={(e) => setPassword(e.target.value)}
      />
      <button type="submit">Login</button>
    </form>
  )
}- lib/posts.js - 用于获取博客文章的逻辑。
export async function getPosts() {
  // 这里应该有获取博客文章的逻辑,例如从数据库或API获取
  return [
    { id: 1, title: 'First Post' },
    { id: 2, title: 'Second Post' },
    // 更多文章...
  ]
}- middleware.js - 可以添加路由中间件来处理登录验证。
export function middleware(req) {
  const { pathname } = req.nextUrl
  // 如果用户未登录且尝试访问受保护的页面,则重定向到登录页面
  if (!isUserLoggedIn() && pathname !== '/login') {
    return NextResponse.redirect(new URL('/login', req.url))
  }
}

function isUserLoggedIn() {
  // 这里应该有检查用户是否登录的逻辑
  return false
}
请注意,这个示例仅用于演示目的,实际的登录逻辑需要实现用户认证和授权,可能涉及到后端服务和数据库操作。此外,Next.js 13 的 app 路由器仍在开发中,可能在最终发布时会有变化。
pages 路由
https://nextjs.org/docs/pages/building-your-application/routing
在 Next.js 中,页面路由系统是基于文件系统构建的。这意味着你可以通过创建文件和文件夹来定义路由。Next.js 会自动将文件名映射到路由路径。例如,如果你创建一个名为 pages/about.js 的文件,Next.js 会自动创建一个 /about 路由。
文件和文件夹的作用
pages/index.js:这是网站的主页,对应于/路径。pages/about.js:这是关于页面,对应于/about路径。pages/blog/[slug].js:这是一个动态路由,用于博客文章。[slug]是一个参数,可以匹配任何路径,如/blog/my-first-post。pages/_app.js:这是一个特殊的文件,用于自定义应用程序的入口点。你可以在这里添加全局样式、状态管理等。pages/_document.js:这是一个特殊的文件,用于自定义 HTML 文档的结构。你可以在这里添加头部、脚本等。
带登录功能的博客网站示例
要创建一个带有登录功能的博客网站,你需要创建几个页面和组件:
pages/index.js:主页,显示登录表单。pages/login.js:登录页面,处理登录逻辑。pages/blog/[slug].js:博客文章页面,显示文章内容。pages/_app.js:自定义应用程序入口,添加全局状态管理。components/LoginForm.js:登录表单组件。
以下是一个简单的示例:
pages/index.js
import LoginForm from '../components/LoginForm'

export default function Home() {
  return (
    <div>
      <h1>Welcome to My Blog</h1>
      <LoginForm />
    </div>
  )
}
pages/login.js
import { useState } from 'react'
import { useRouter } from 'next/router'

export default function Login() {
  const [email, setEmail] = useState('')
  const [password, setPassword] = useState('')
  const router = useRouter()

  const handleSubmit = async (e) => {
    e.preventDefault()
    // 这里应该有登录逻辑,比如调用API
    // 假设登录成功后,跳转到博客文章页面
    router.push('/blog/my-first-post')
  }

  return (
    <form onSubmit={handleSubmit}>
      <input
        type="email"
        placeholder="Email"
        value={email}
        onChange={(e) => setEmail(e.target.value)}
      />
      <input
        type="password"
        placeholder="Password"
        value={password}
        onChange={(e) => setPassword(e.target.value)}
      />
      <button type="submit">Login</button>
    </form>
  )
}
pages/blog/[slug].js
import { useRouter } from 'next/router'

export default function BlogPost() {
  const router = useRouter()
  const { slug } = router.query

  return (
    <div>
      <h1>Blog Post: {slug}</h1>
      {/* 这里应该有博客文章的内容 */}
    </div>
  )
}
pages/_app.js
import { useState } from 'react'

export default function MyApp({ Component, pageProps }) {
  const [user, setUser] = useState(null)

  return (
    <div>
      {user ? (
        <Component {...pageProps} />
      ) : (
        <LoginForm onLogin={(user) => setUser(user)} />
      )}
    </div>
  )
}
components/LoginForm.js
import { useState } from 'react'

export default function LoginForm({ onLogin }) {
  const [email, setEmail] = useState('')
  const [password, setPassword] = useState('')

  const handleSubmit = async (e) => {
    e.preventDefault()
    // 这里应该有登录逻辑,比如调用API
    // 假设登录成功后,调用 onLogin 函数
    onLogin({ email, password })
  }

  return (
    <form onSubmit={handleSubmit}>
      <input
        type="email"
        placeholder="Email"
        value={email}
        onChange={(e) => setEmail(e.target.value)}
      />
      <input
        type="password"
        placeholder="Password"
        value={password}
        onChange={(e) => setPassword(e.target.value)}
      />
      <button type="submit">Login</button>
    </form>
  )
}这个示例中,_app.js 负责管理全局状态,包括用户登录状态。LoginForm 组件用于处理登录逻辑,并在用户登录成功后,通过 onLogin 回调函数将用户信息传递给 _app.js。index.js 和 login.js 分别是主页和登录页面,blog/[slug].js 是博客文章页面。
请注意,这个示例没有包含实际的登录验证逻辑,你需要根据实际情况添加 API 调用和状态管理。此外,为了安全起见,密码应该使用加密方式处理,而不是明文存储或传输。
import Image from 'next/image'
import WalletButtons from '@/components/WalletButtons'
import Body from '@/app/home/body/Header'
export default function Home() {
return (
<>
<main className="flex min-h-screen flex-col items-center justify-between p-24">
{/* <WalletButtons /> */}
<Body />
{/* <div className="z-10 w-full max-w-5xl items-center justify-between font-mono text-sm lg:flex">
<WalletButtons />
<Body />
<div className="fixed bottom-0 left-0 flex h-48 w-full items-end justify-center bg-gradient-to-t from-white via-white dark:from-black dark:via-black lg:static lg:size-auto lg:bg-none">
<a
className="pointer-events-none flex place-items-center gap-2 p-8 lg:pointer-events-auto lg:p-0"
href="https://vercel.com?utm_source=create-next-app&utm_medium=appdir-template&utm_campaign=create-next-app"
target="_blank"
rel="noopener noreferrer"
>
By{' '}
<Image
src="/vercel.svg"
alt="Vercel Logo"
className="dark:invert"
width={100}
height={24}
priority
/>
</a>
</div>
</div> */}
{/* <div className="relative z-[-1] flex place-items-center before:absolute before:h-[300px] before:w-full before:-translate-x-1/2 before:rounded-full before:bg-gradient-radial before:from-white before:to-transparent before:blur-2xl before:content-[''] after:absolute after:-z-20 after:h-[180px] after:w-full after:translate-x-1/3 after:bg-gradient-conic after:from-sky-200 after:via-blue-200 after:blur-2xl after:content-[''] before:dark:bg-gradient-to-br before:dark:from-transparent before:dark:to-blue-700 before:dark:opacity-10 after:dark:from-sky-900 after:dark:via-[#0141ff] after:dark:opacity-40 sm:before:w-[480px] sm:after:w-[240px] before:lg:h-[360px]">
<Image
className="relative dark:drop-shadow-[0_0_0.3rem_#ffffff70] dark:invert"
src="/next.svg"
alt="Next.js Logo"
width={180}
height={37}
priority
/>
</div> */}
{/* <div className="mb-32 grid text-center lg:mb-0 lg:w-full lg:max-w-5xl lg:grid-cols-4 lg:text-left">
<a
href="https://nextjs.org/docs?utm_source=create-next-app&utm_medium=appdir-template&utm_campaign=create-next-app"
className="group rounded-lg border border-transparent px-5 py-4 transition-colors hover:border-gray-300 hover:bg-gray-100 hover:dark:border-neutral-700 hover:dark:bg-neutral-800/30"
target="_blank"
rel="noopener noreferrer"
>
<h2 className="mb-3 text-2xl font-semibold">
Docs{' '}
<span className="inline-block transition-transform group-hover:translate-x-1 motion-reduce:transform-none">
->
</span>
</h2>
<p className="m-0 max-w-[30ch] text-sm opacity-50">
Find in-depth information about Next.js features and API.
</p>
</a>
<a
href="https://nextjs.org/learn?utm_source=create-next-app&utm_medium=appdir-template-tw&utm_campaign=create-next-app"
className="group rounded-lg border border-transparent px-5 py-4 transition-colors hover:border-gray-300 hover:bg-gray-100 hover:dark:border-neutral-700 hover:dark:bg-neutral-800/30"
target="_blank"
rel="noopener noreferrer"
>
<h2 className="mb-3 text-2xl font-semibold">
Learn{' '}
<span className="inline-block transition-transform group-hover:translate-x-1 motion-reduce:transform-none">
->
</span>
</h2>
<p className="m-0 max-w-[30ch] text-sm opacity-50">
Learn about Next.js in an interactive course with quizzes!
</p>
</a>
<a
href="https://vercel.com/templates?framework=next.js&utm_source=create-next-app&utm_medium=appdir-template&utm_campaign=create-next-app"
className="group rounded-lg border border-transparent px-5 py-4 transition-colors hover:border-gray-300 hover:bg-gray-100 hover:dark:border-neutral-700 hover:dark:bg-neutral-800/30"
target="_blank"
rel="noopener noreferrer"
>
<h2 className="mb-3 text-2xl font-semibold">
Templates{' '}
<span className="inline-block transition-transform group-hover:translate-x-1 motion-reduce:transform-none">
->
</span>
</h2>
<p className="m-0 max-w-[30ch] text-sm opacity-50">
Explore starter templates for Next.js.
</p>
</a>
<a
href="https://vercel.com/new?utm_source=create-next-app&utm_medium=appdir-template&utm_campaign=create-next-app"
className="group rounded-lg border border-transparent px-5 py-4 transition-colors hover:border-gray-300 hover:bg-gray-100 hover:dark:border-neutral-700 hover:dark:bg-neutral-800/30"
target="_blank"
rel="noopener noreferrer"
>
<h2 className="mb-3 text-2xl font-semibold">
Deploy{' '}
<span className="inline-block transition-transform group-hover:translate-x-1 motion-reduce:transform-none">
->
</span>
</h2>
<p className="m-0 max-w-[30ch] text-balance text-sm opacity-50">
Instantly deploy your Next.js site to a shareable URL with Vercel.
</p>
</a>
</div> */}
</main>
</>
)
}